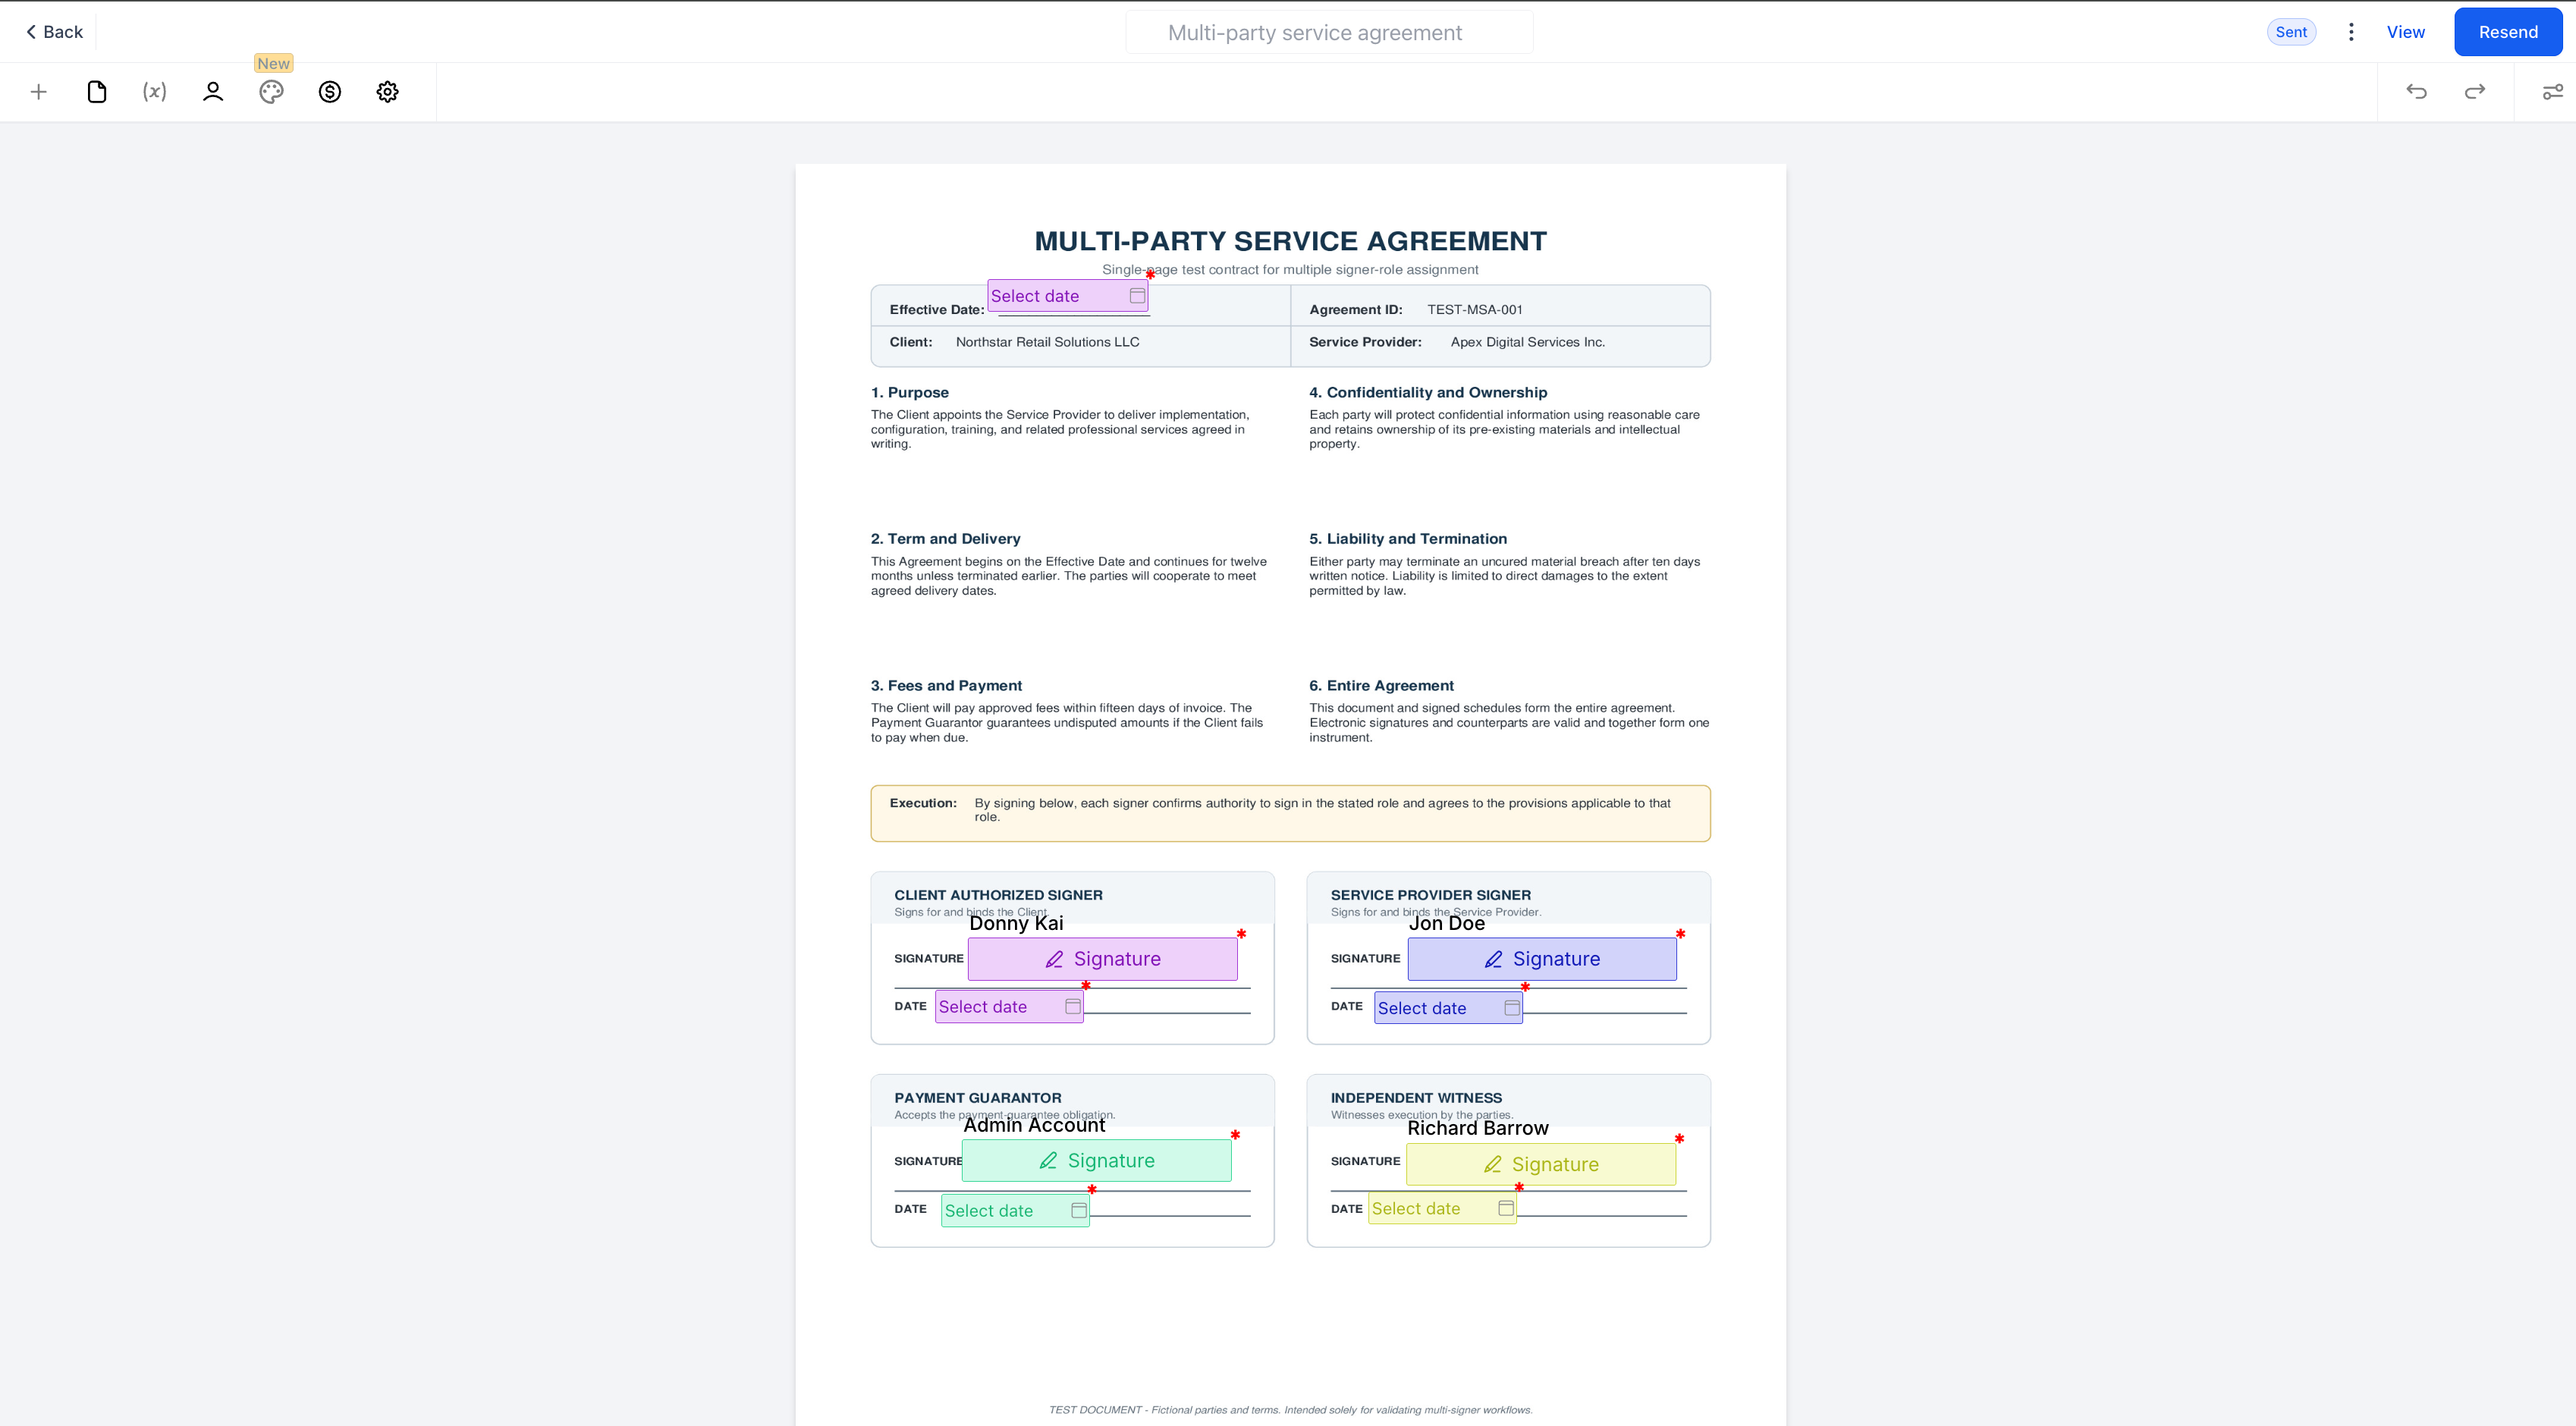
🚀 Multi-role signing for your Documents and Contracts templates, right inside Workflows.
Documents and Contracts Templates with Multiple Signer Roles
Documents and contracts templates can now accommodate various signer roles — buyer, seller, witness, or any custom role you define. When a document is sent through a workflow, every role is automatically populated and routed for signature, eliminating the need for manual re-entry.
You can send agreements that require more than one signature — for instance, a buyer and a seller, a client and a co-signer, or a tenant and a guarantor. Previously, templates only supported a single signer, which meant you had to manually add each person’s details every time you sent a document, or deal with cumbersome duplicate templates.
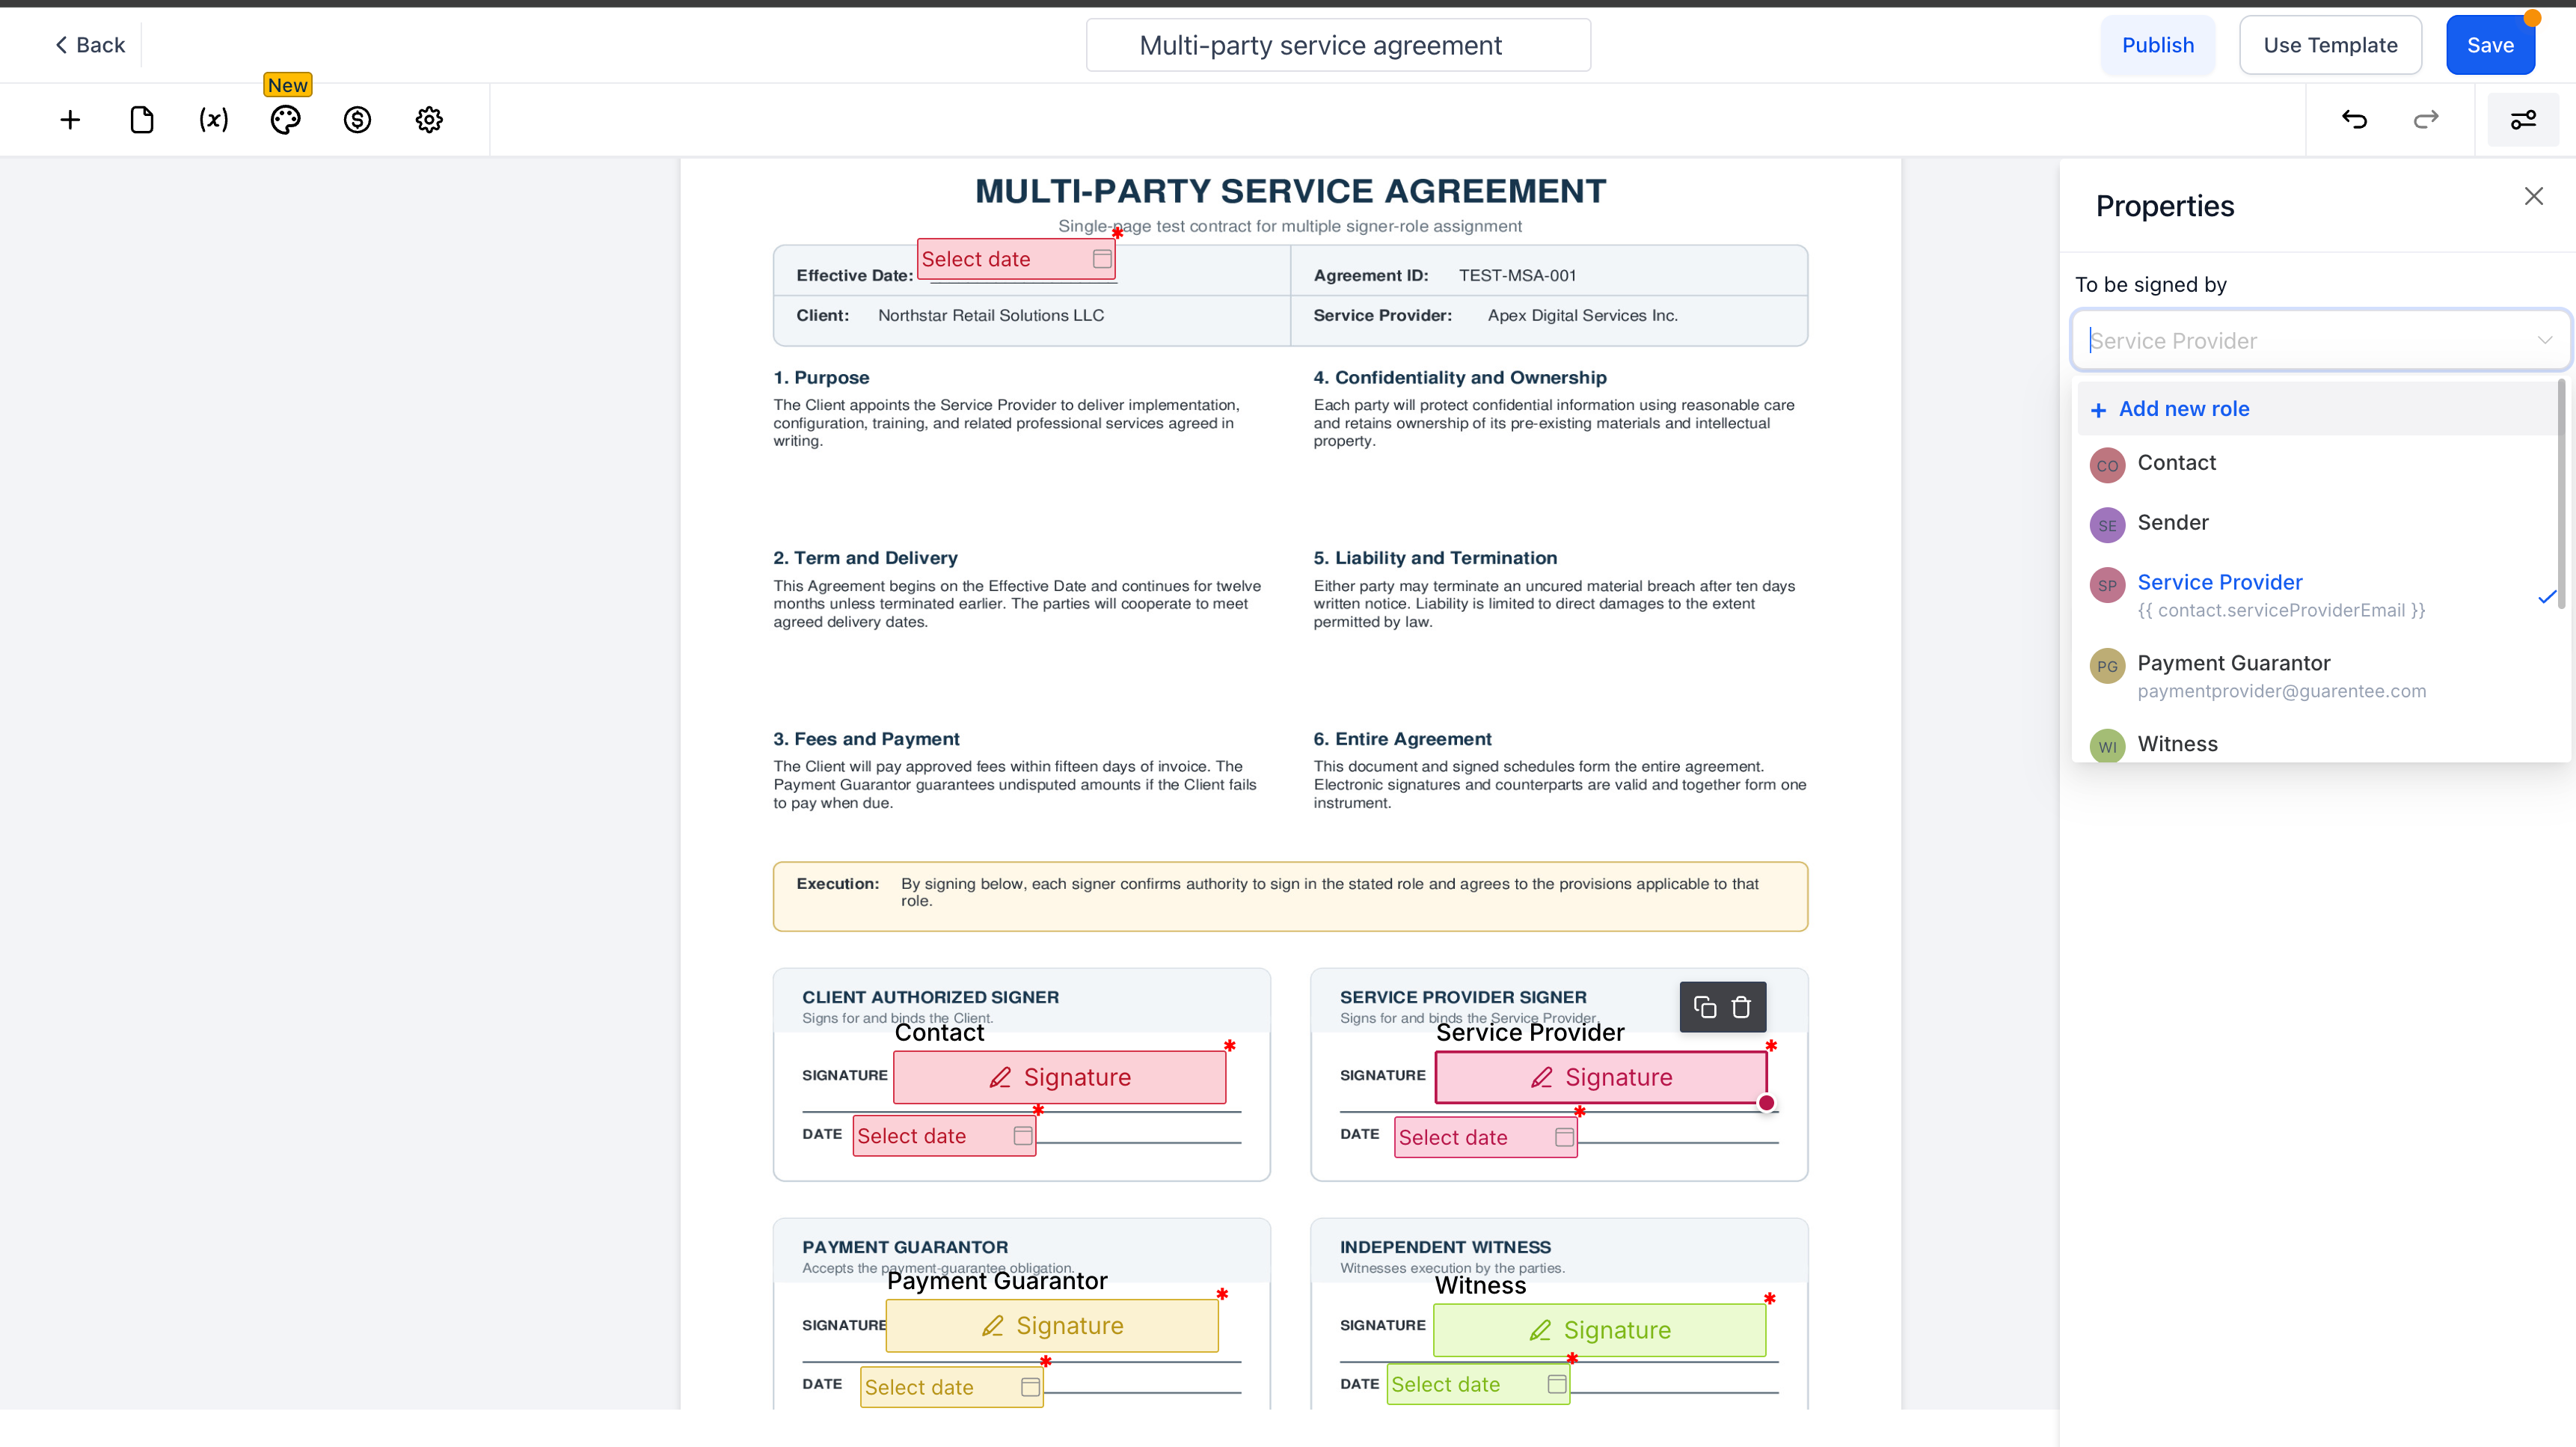
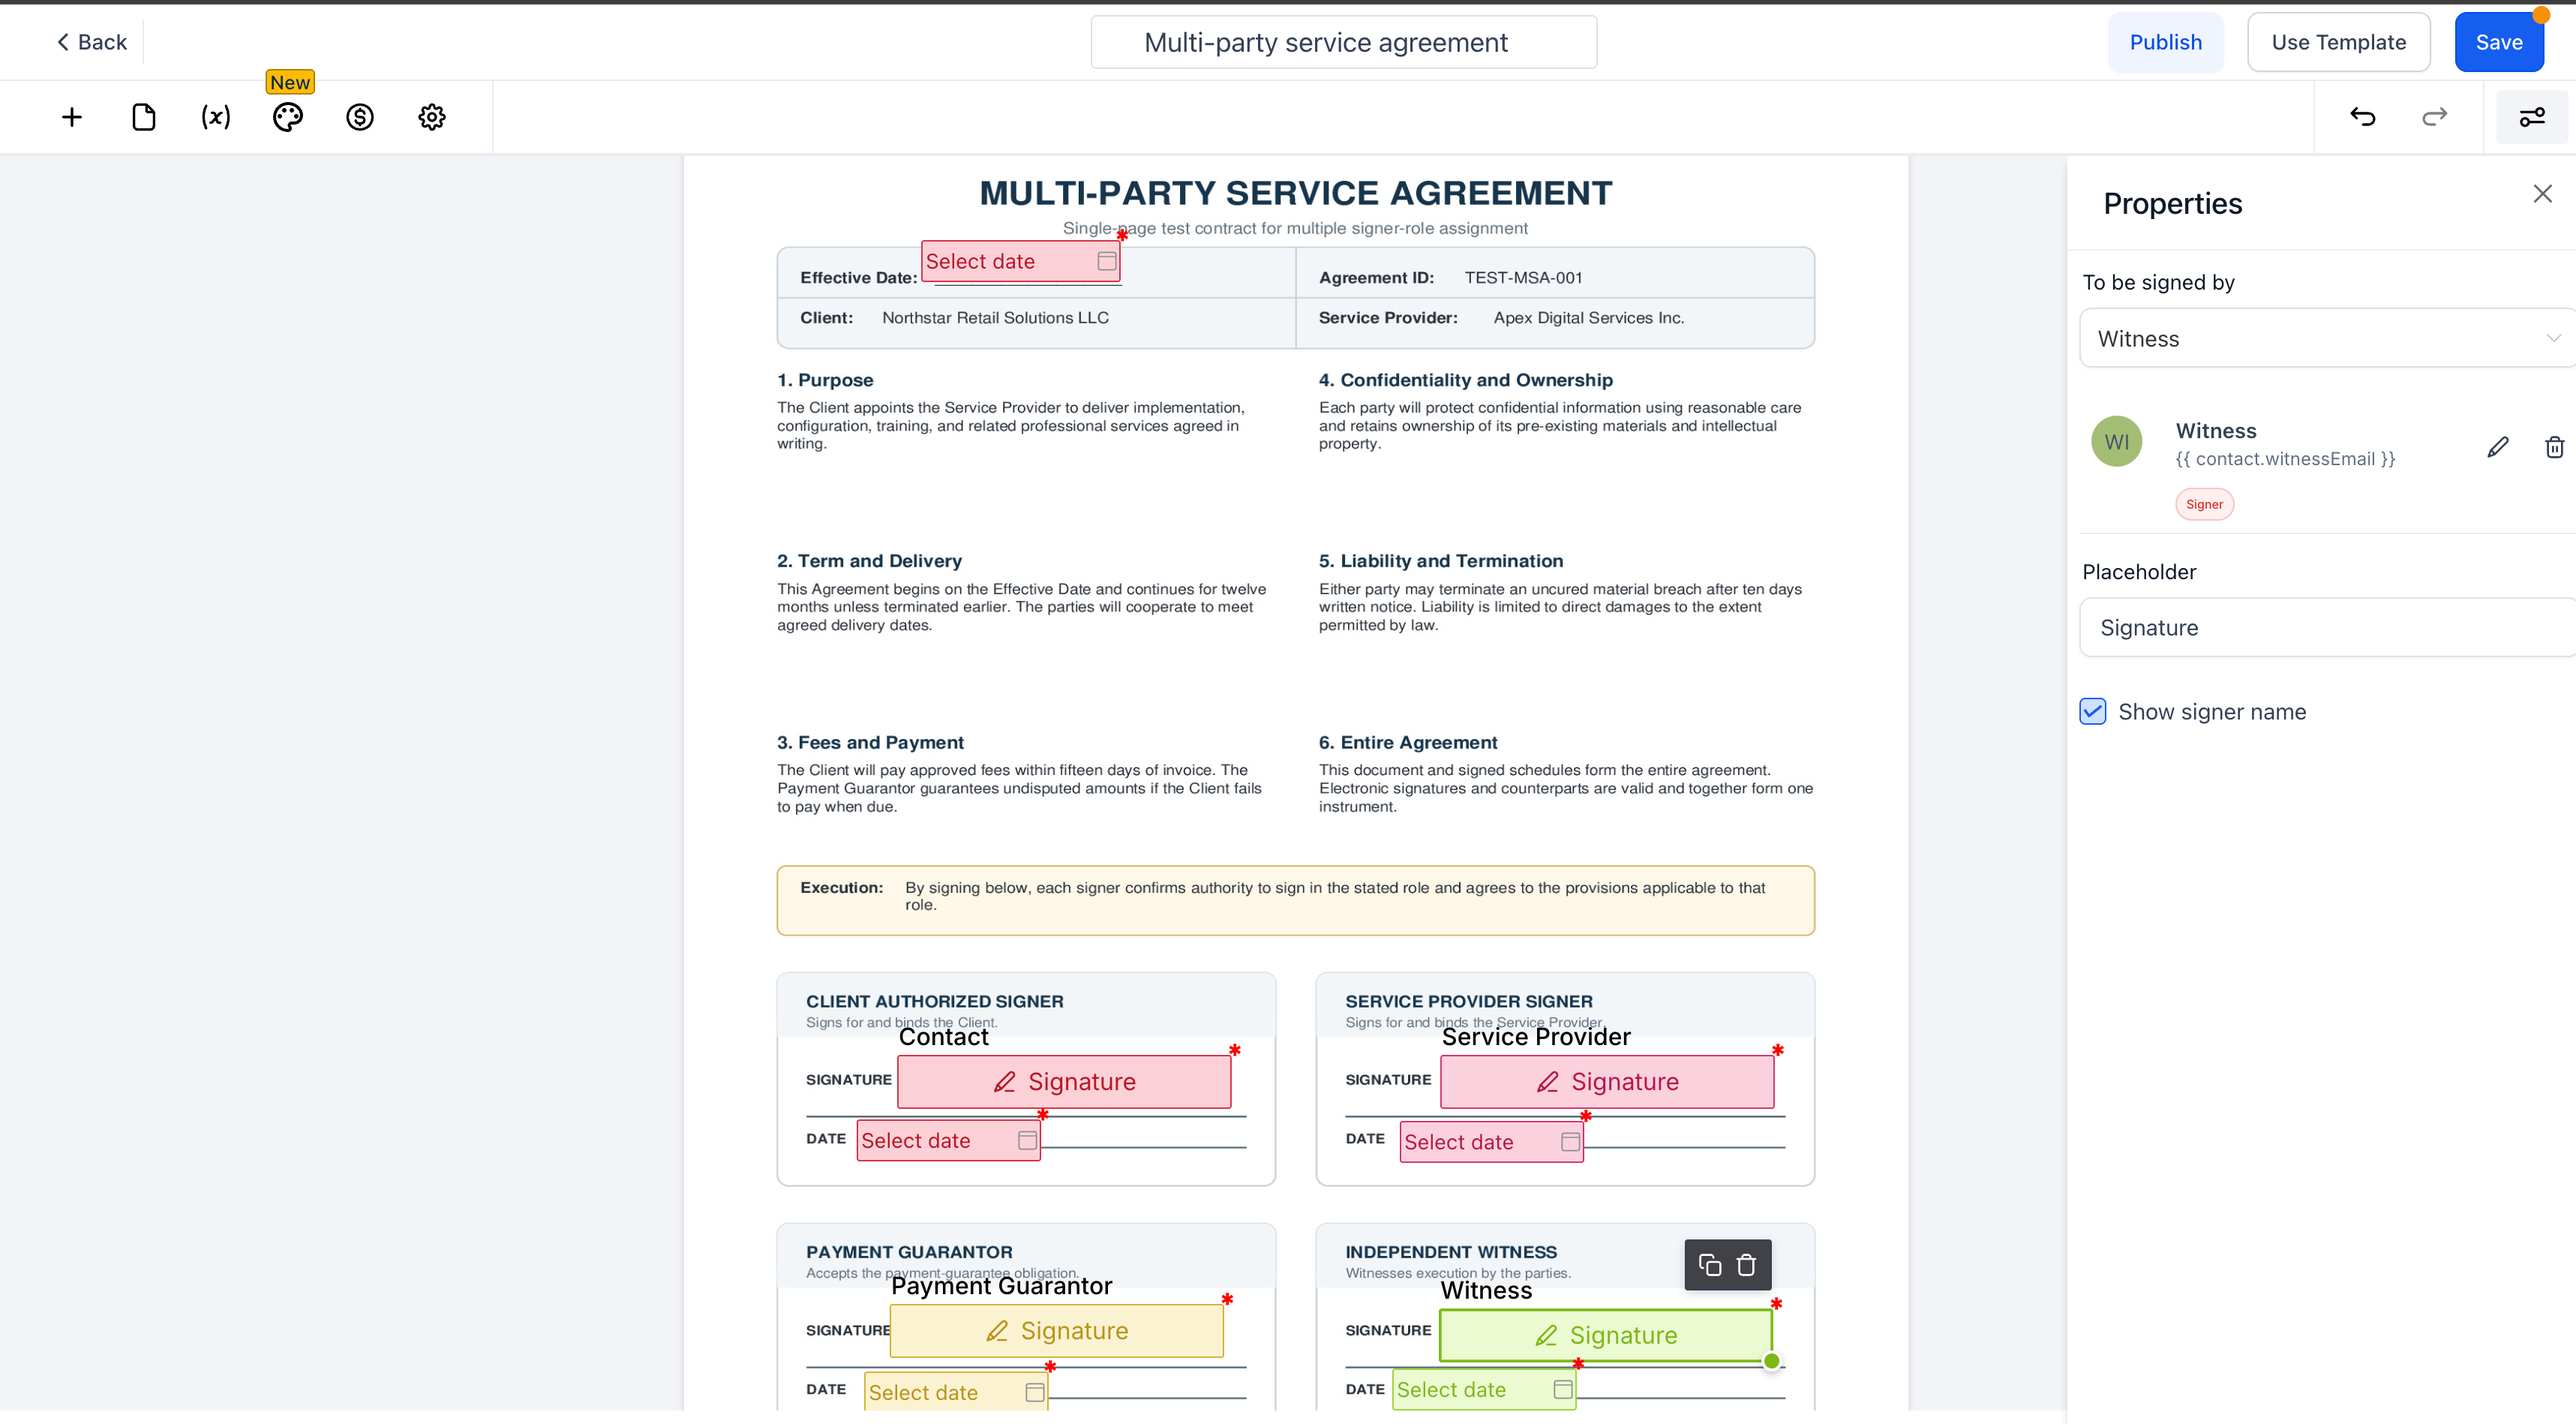
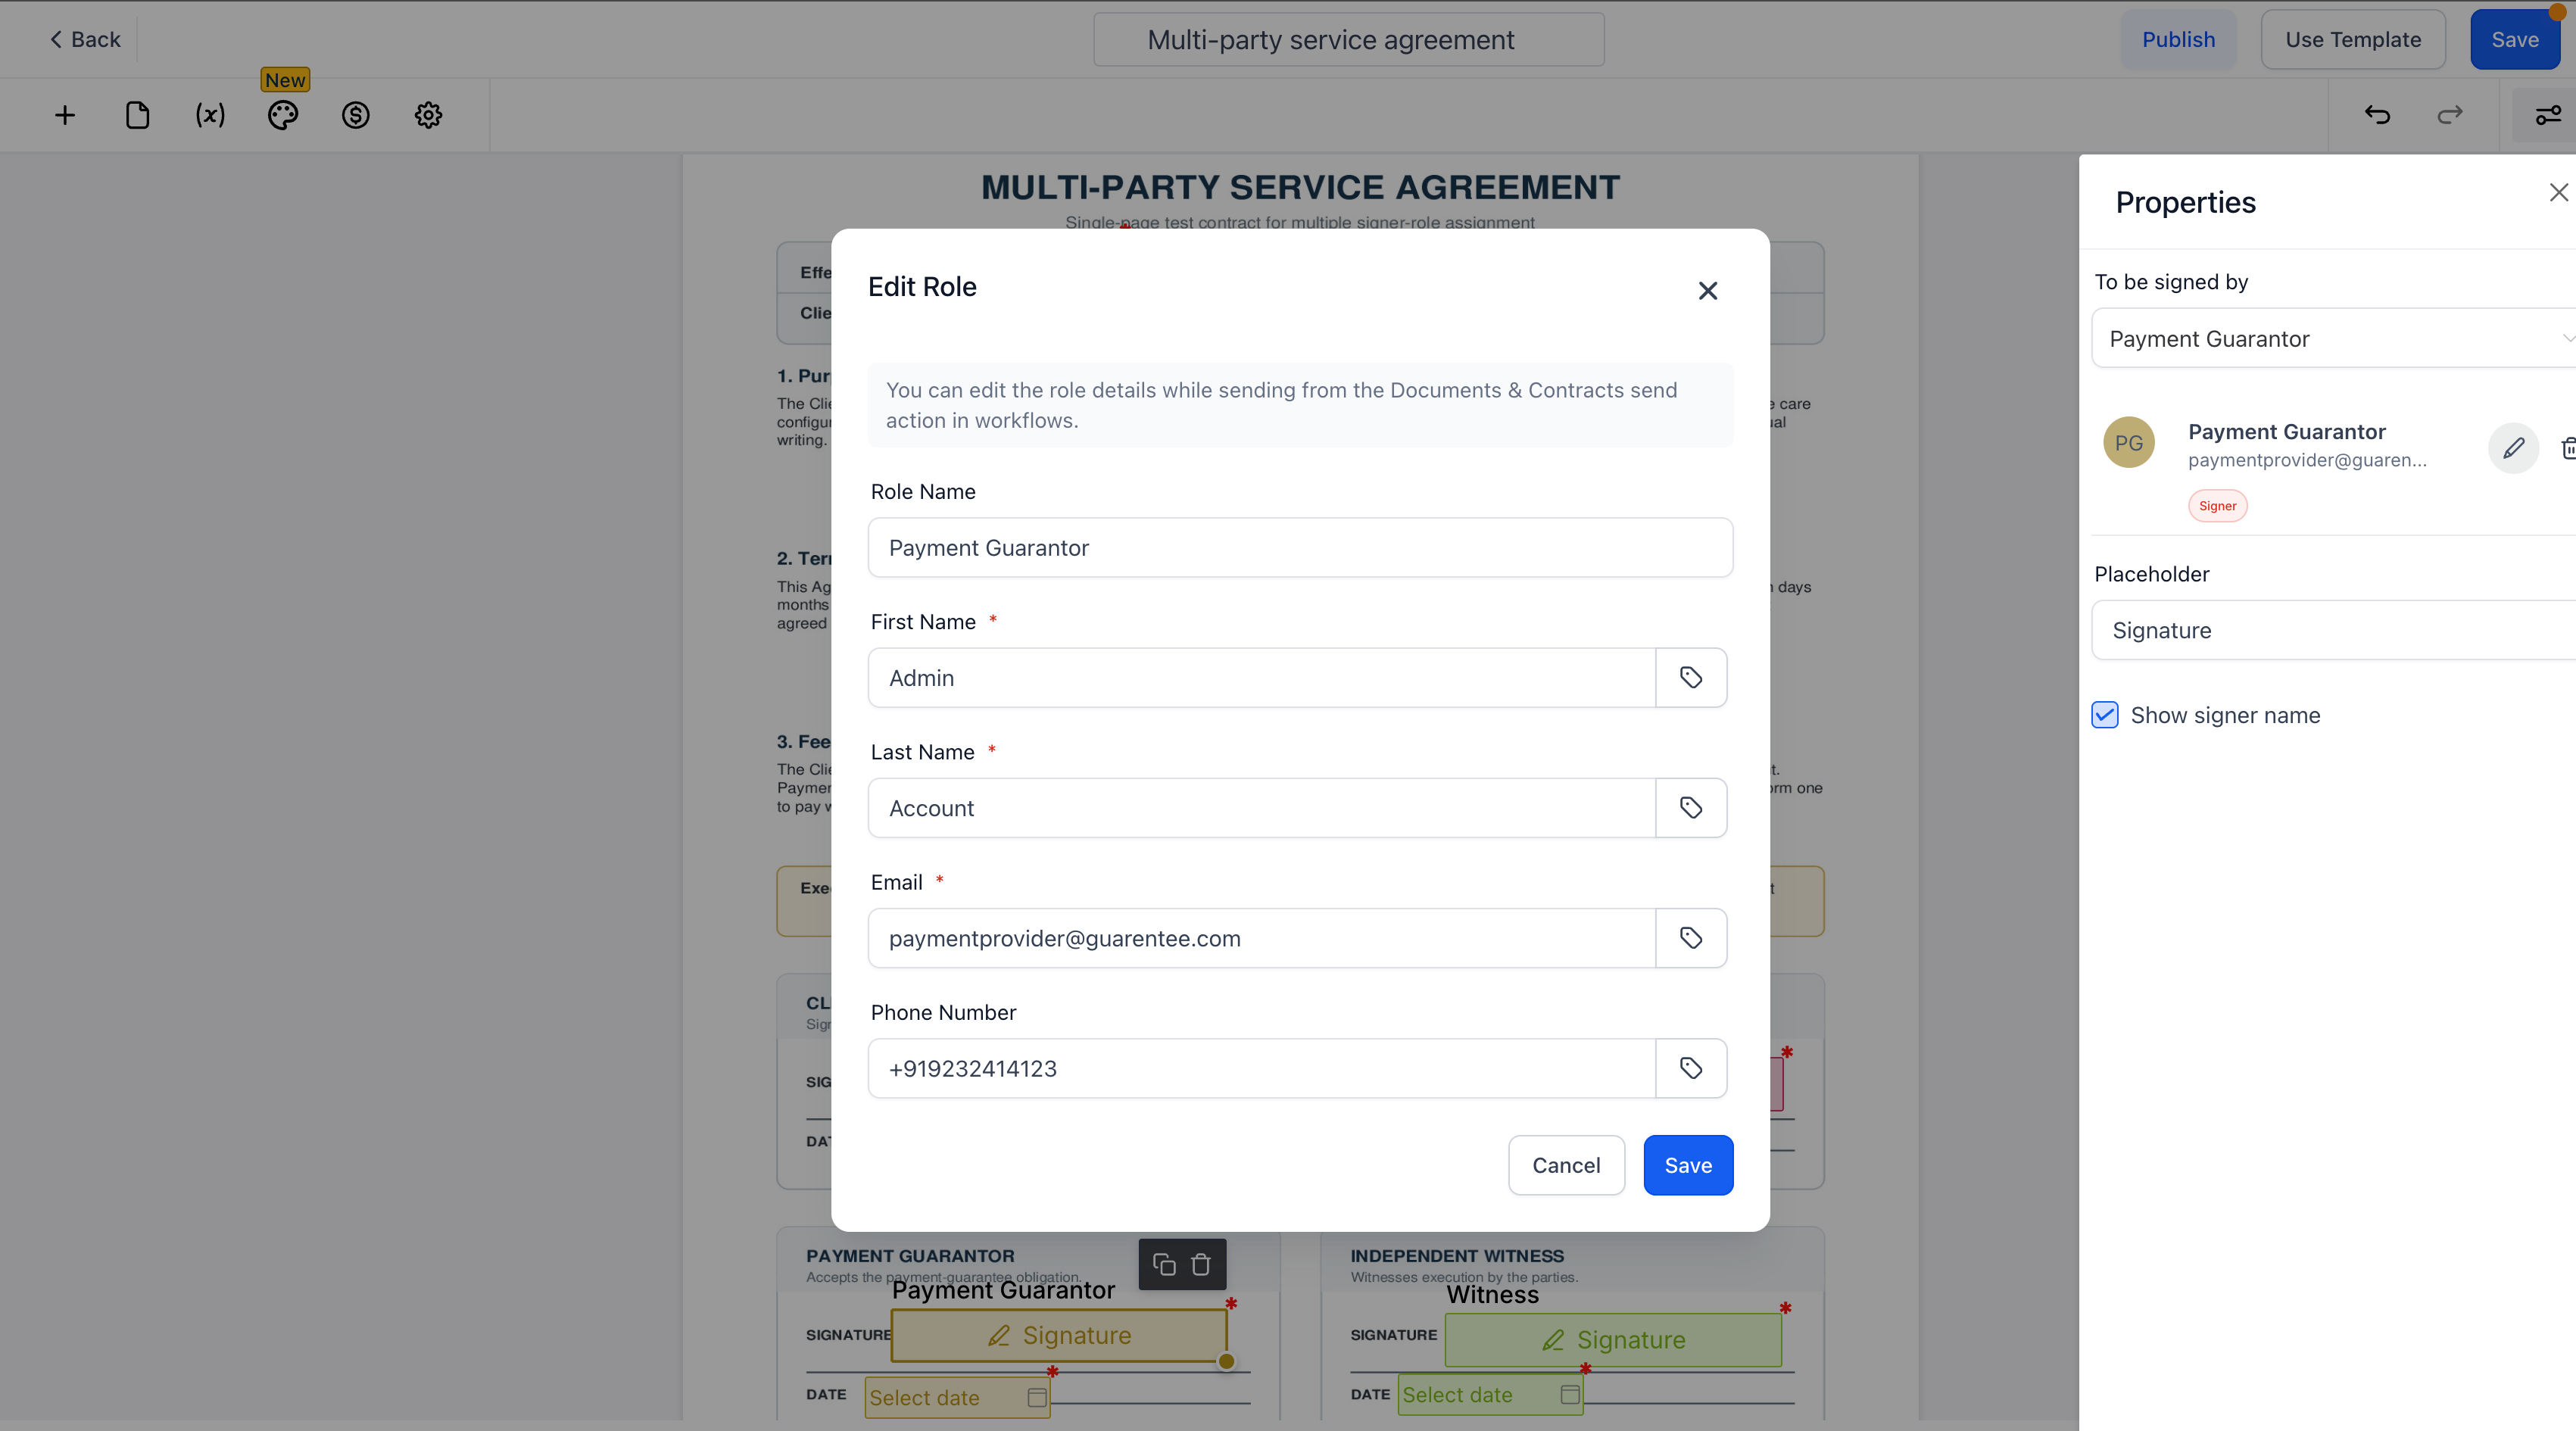
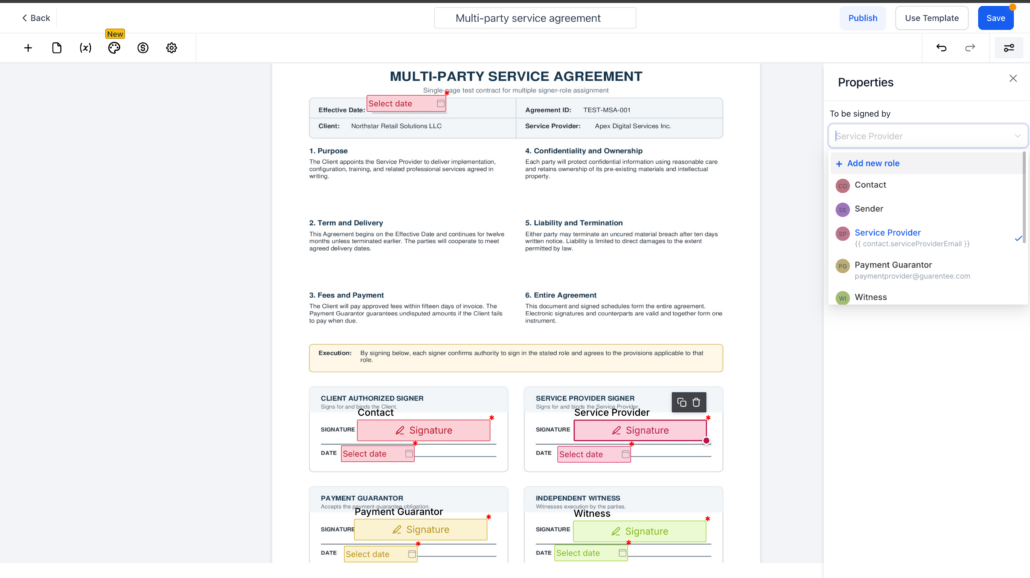
You can define signer roles directly on your template — up to six per template — and assign fields (such as signature or date) to each role. When you send that template through a workflow, Clixio automatically pulls in the roles you’ve set up. If you’re missing a detail, you can fill it in or override any role’s name, email, or phone number right at the workflow level, without altering the template.
🏆 How This Supercharges Your Business
-
Save Time: No more manually re-entering signer details for each multi-party agreement you send.
-
Reduce Errors: Role values set on the template auto-populate, minimising missed or mistyped signer information.
-
Stay Flexible: Override any role’s details per workflow, allowing one template to accommodate various deals.
-
Scale Complex Deals: Real estate, contracting, and services businesses can now route agreements needing multiple signatures (e.g., buyer + seller + witness) in one go.
🛠️ How to Get Started
-
Build your template: Open your Proposal/Estimate template and define signer roles (name, email, phone), assigning at least one fillable element to each role. Roles may have static or custom values that are resolved when the document is sent, depending on your use case.
-
Assign a Contact field: Ensure that at least one fillable element is assigned to “Contact” — this is essential for the workflow send action to function.
-
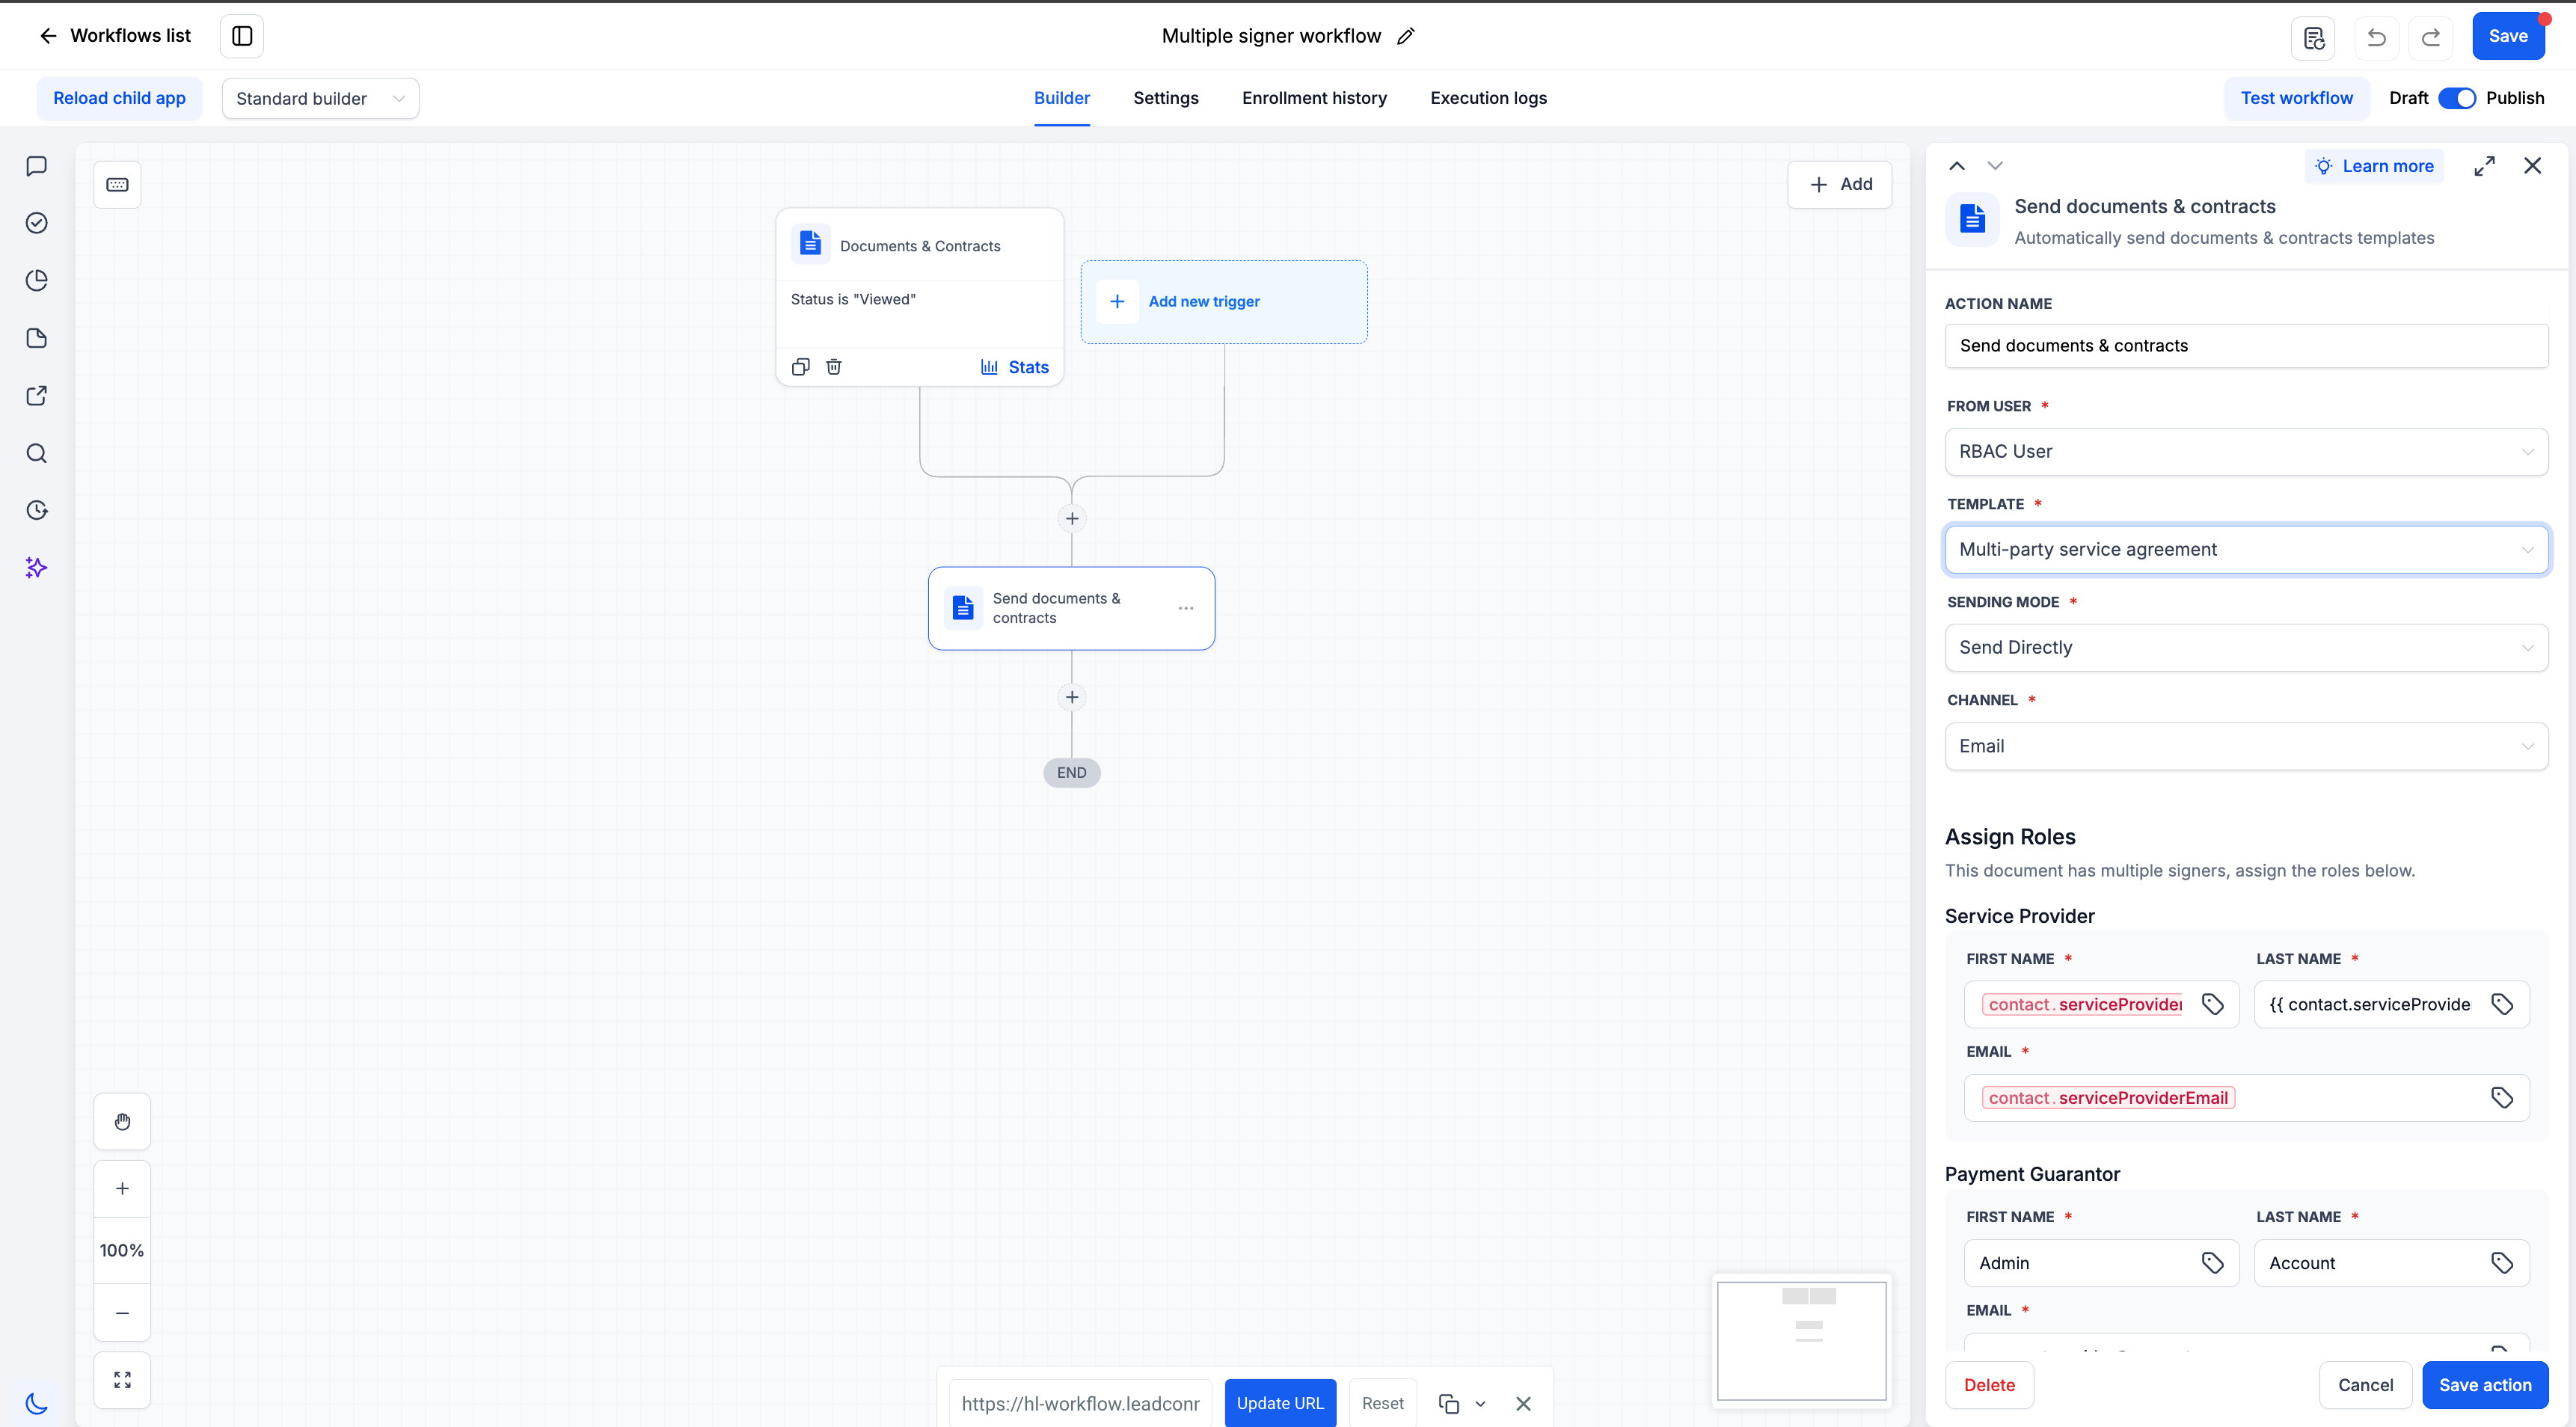
Select your template in a Workflow: Add the “Send Document” action and choose your multi-role template — roles will auto-populate.
-
Override if needed: Adjust any role’s name, email, or phone at the workflow level — these values will take precedence over the template defaults.
-
Send: Launch the workflow — each signer will receive their document in the order and role you’ve defined.
We are continually enhancing signing order controls and expanding role-based automation across more document types — so stay tuned for even greater control over how multi-party agreements move through your pipeline.
- Up to six roles can be added per template; roles are specific to that template.
- Roles will only auto-populate when the document is sent via a workflow (not through a manual send).
- At least one fillable element must be assigned to “Contact” for the workflow send action to operate. Role details set at the workflow level will override the template’s default values.
- If a required role email is missing, you’ll be prompted to complete it before sending. Duplicate emails across roles will trigger an alert.
- This feature is currently available on the web.