Klaviyo: Workflow Actions & Triggers
Klaviyo is a marketing automation platform designed around unified customer profiles, which include subscription status across email and SMS. These profiles are managed through lists, segments (dynamic groups created from profile conditions), and metrics (event streams such as ‘Placed Order’ or ‘Viewed Product’). Klaviyo campaigns and flows are built to target these fundamental elements. The Klaviyo integration brings them directly into the Workflow Builder, allowing customer-facing automation to respond to Klaviyo activities and update records in real time as workflow data changes.
This integration enables a new Klaviyo signup to become a CRM contact instantly, high-value segment matches to trigger internal alerts, and for CRM contacts to be created or updated as Klaviyo profiles. Additionally, milestone-triggered workflows can send pre-staged Klaviyo campaigns—all within a single automation.
The integration consists of two main components:
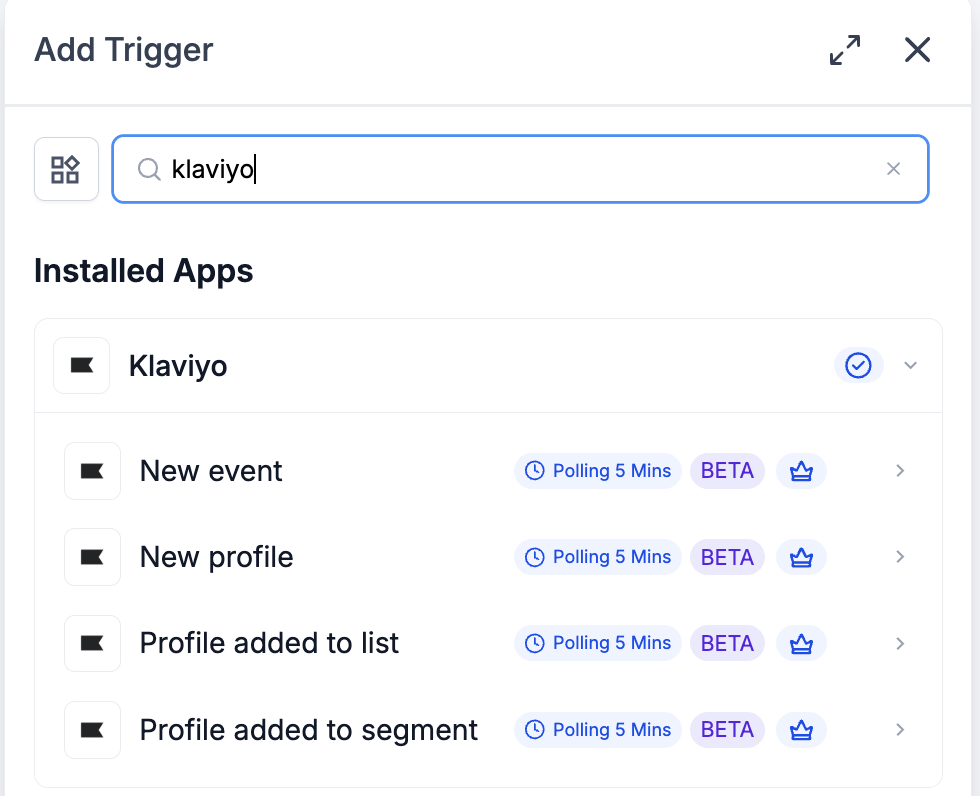
- Triggers (Klaviyo → Workflows): Four polling triggers—New event, New profile, Profile added to list, Profile added to segment—each running every 5 minutes and returning matching records since the last poll.
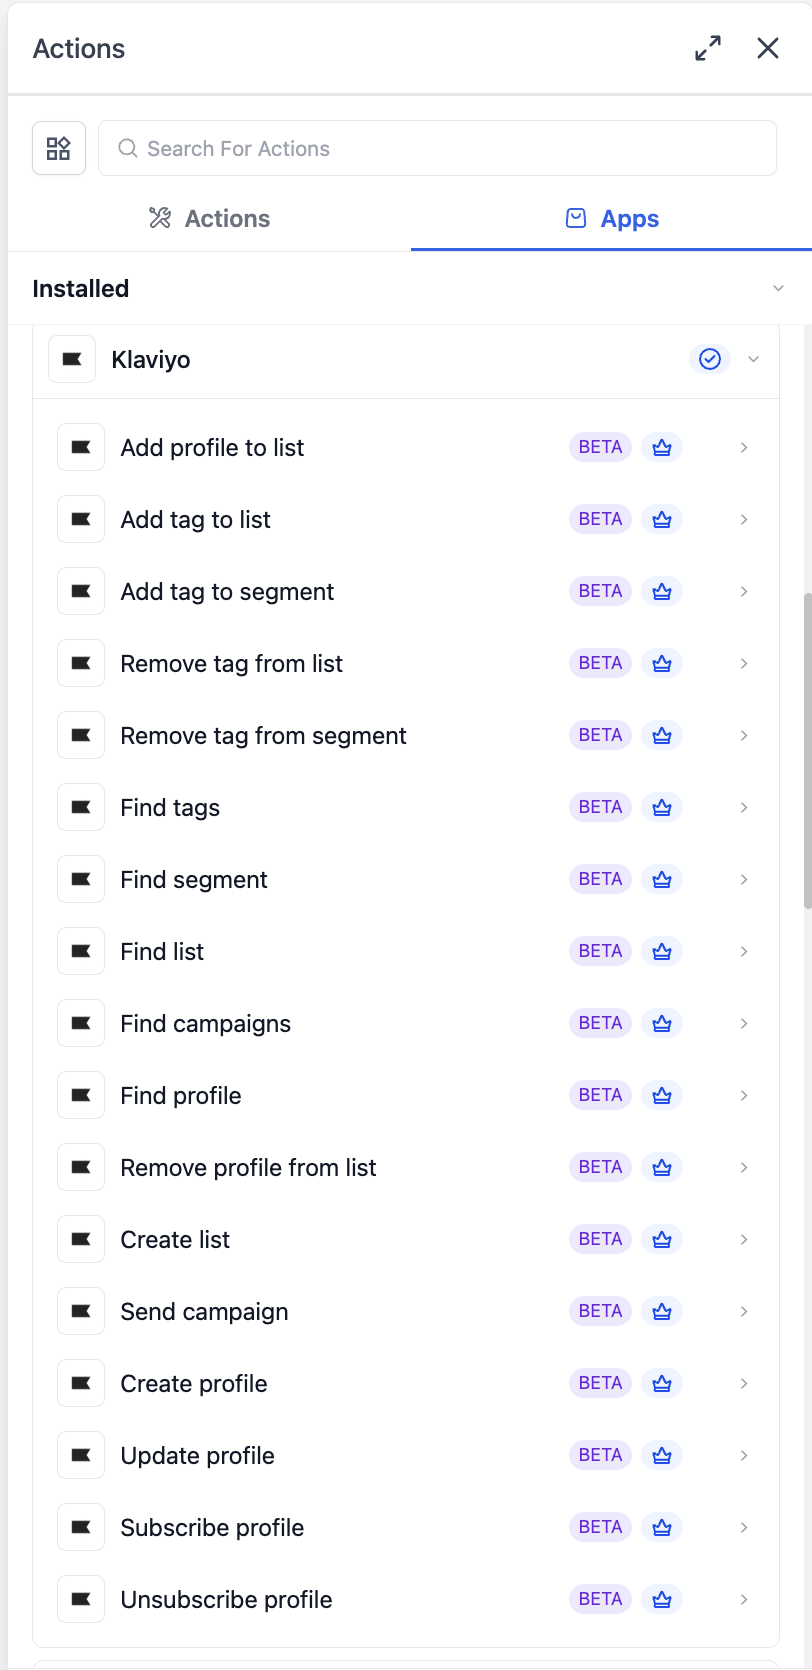
- Actions (Workflows → Klaviyo): Seventeen actions that cover the complete profile lifecycle (create/update/find/subscribe/unsubscribe), list management (create/find/add/remove), segment lookup, tag management across lists and segments, campaign discovery, and one-click sending of a draft campaign.
All triggers and actions are classified as premium workflow components; therefore, premium action credits are applied at the standard automation rate. Klaviyo plan usage (active profiles, SMS credits) is billed directly on your Klaviyo account.
Key Benefits of Klaviyo in Workflows
- Polling triggers every 5 minutes—providing near-real-time updates without the need for webhook setup; matching records are processed in batches and in order.
- Complete profile lifecycle management in one location—create, update, find, subscribe, and unsubscribe actions ensure workflows can execute precisely what is needed.
- Consent-aware subscriptions—The Subscribe profile function has channel-specific flags, allowing email and SMS consents to be tracked independently, in accordance with how Klaviyo and regulations (TCPA / GDPR / CASL) monitor consent.
- List and segment lookups—Find list, Find segment, and Find campaigns enable workflows to reference identifiers at runtime, avoiding hardcoding IDs.
- Tag taxonomy across lists and segments—manage Klaviyo tags as workflow-driven metadata across both lists and segments with a unified set of actions.
- Workflow-driven campaign sending—The Send campaign action allows a workflow milestone, schedule, or condition to trigger a draft Klaviyo campaign immediately.
Before any Klaviyo trigger or action can commence, the integration must be connected via OAuth.
Connect via the Workflow Builder (recommended)
- Open Automation → Workflows and either choose or create a workflow.
- Add a Klaviyo trigger or action by searching for Klaviyo in the Apps tab.
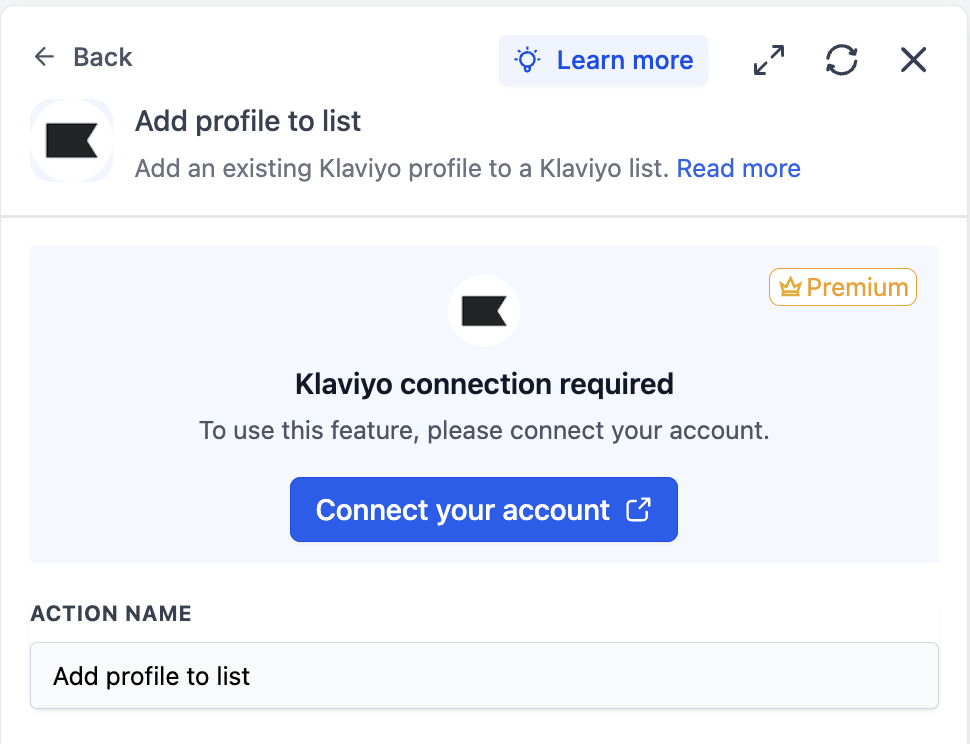
- Select any Klaviyo trigger or action.
- On the action card, click Connect your account.
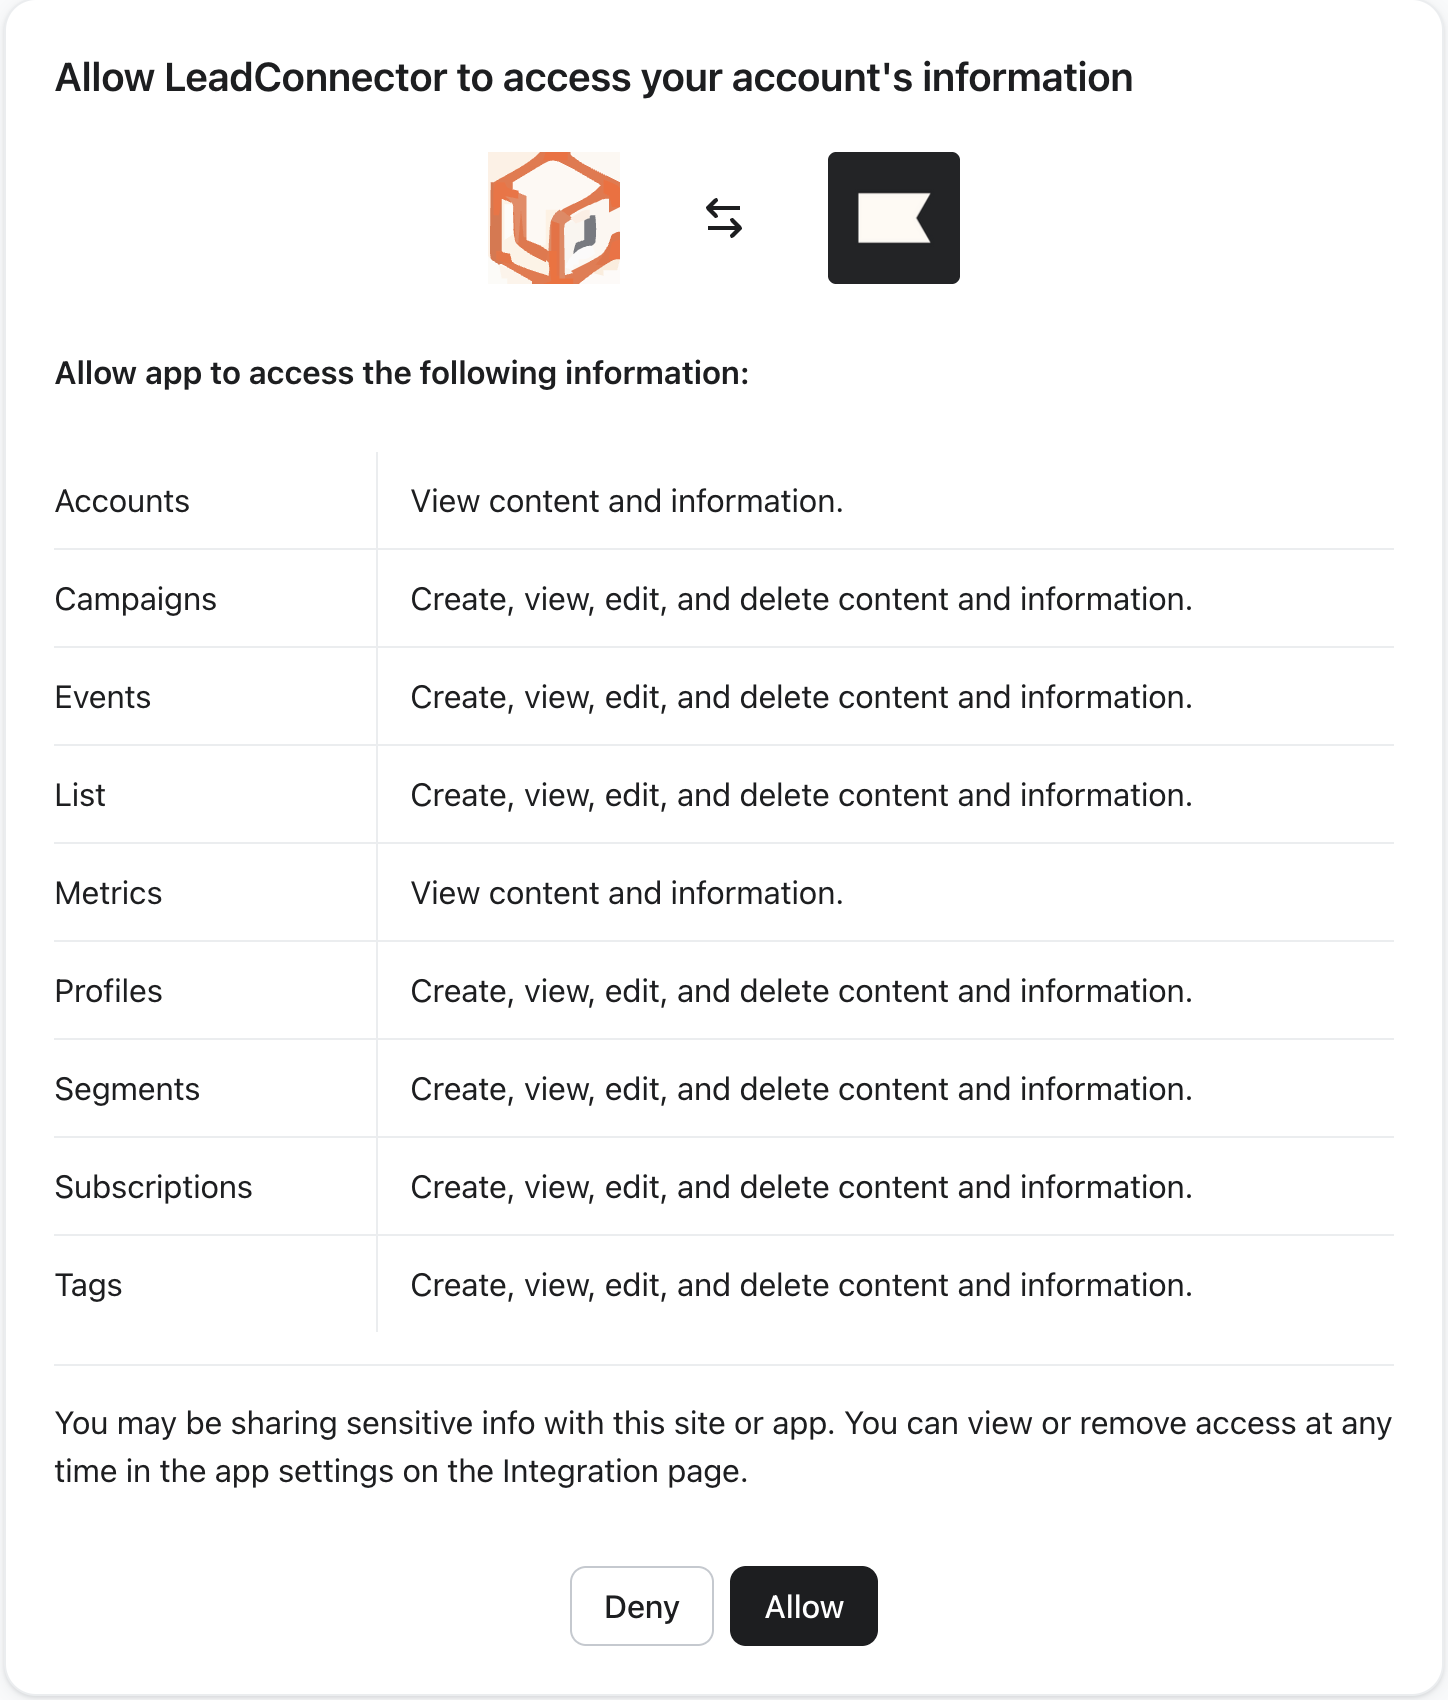
- This will redirect you to Klaviyo’s authorisation screen. Review the requested scopes—Accounts, Campaigns, Events, List, Metrics, Profiles, Segments, Subscriptions, Tags—and click Allow.
- You will be redirected back to the Workflow Builder, where the panel will display Connected.
Connect via Settings (alternative path)
- Go to Settings → Integrations.
- Find Klaviyo and click Connect.
- Complete the OAuth flow on Klaviyo’s authorisation screen before returning to the platform.
All triggers poll Klaviyo every 5 minutes, returning matching records since the last poll in sequence.
- New event – Triggers when a new event of any tracked metric is recorded against a profile. You can filter by Metric (e.g., Placed Order, Viewed Product, or custom event).
- New profile – Triggers when a new profile is created in Klaviyo, returning the full profile information, including subscription status across email and SMS.
- Profile added to list – Triggers when a profile is added to a Klaviyo list, and is filterable by List.
- Profile added to segment – Triggers when a profile matches the conditions of a Klaviyo segment for the first time, and is filterable by Segment.
- Create profile – Creates a new Klaviyo profile from workflow data. This action does not subscribe the profile—use the Subscribe profile action separately if explicit consent has been obtained.
- Update profile – Updates an existing profile by ID or email but does not alter consent status.
- Find profile – Looks up a profile by email or phone, returning the profile information if found.
- Subscribe profile – Subscribes a profile to email and/or SMS with explicit consent, managing channels independently.
- Unsubscribe profile – Unsubscribes a profile from email and/or SMS.
- Create list – Creates a new Klaviyo list with the specified name and returns the list ID.
- Find list – Looks up a Klaviyo list by name.
- Add profile to list – Adds an existing profile to a list (membership only—does not change consent).
- Remove profile from list – Removes a profile from a list (membership only).
- Find segment – Looks up a Klaviyo segment by name and returns the segment ID.
- Find tags – Lists tags from the Klaviyo account, optionally filtered by name.
- Add tag to list – Attaches one or more tags to a Klaviyo list.
- Remove tag from list – Detaches one or more tags from a Klaviyo list.
- Add tag to segment – Attaches one or more tags to a Klaviyo segment.
- Remove tag from segment – Detaches one or more tags from a Klaviyo segment.
- Find campaigns – Lists campaigns from the Klaviyo account, useful for discovering a draft to send.
- Send campaign – Sends a draft Klaviyo campaign immediately. The recipients, subject, and content are configured within Klaviyo.
Example: Setting Up a Trigger (Profile added to list)
This example will guide you through creating a workflow that triggers every time a profile is added to a specific Klaviyo list, using the profile data as the basis for downstream actions.
Step 1: Add the Trigger
- Open the workflow and click Add Trigger.
- Switch to the Apps tab and search for Klaviyo.
- Select Profile added to list from the trigger list.
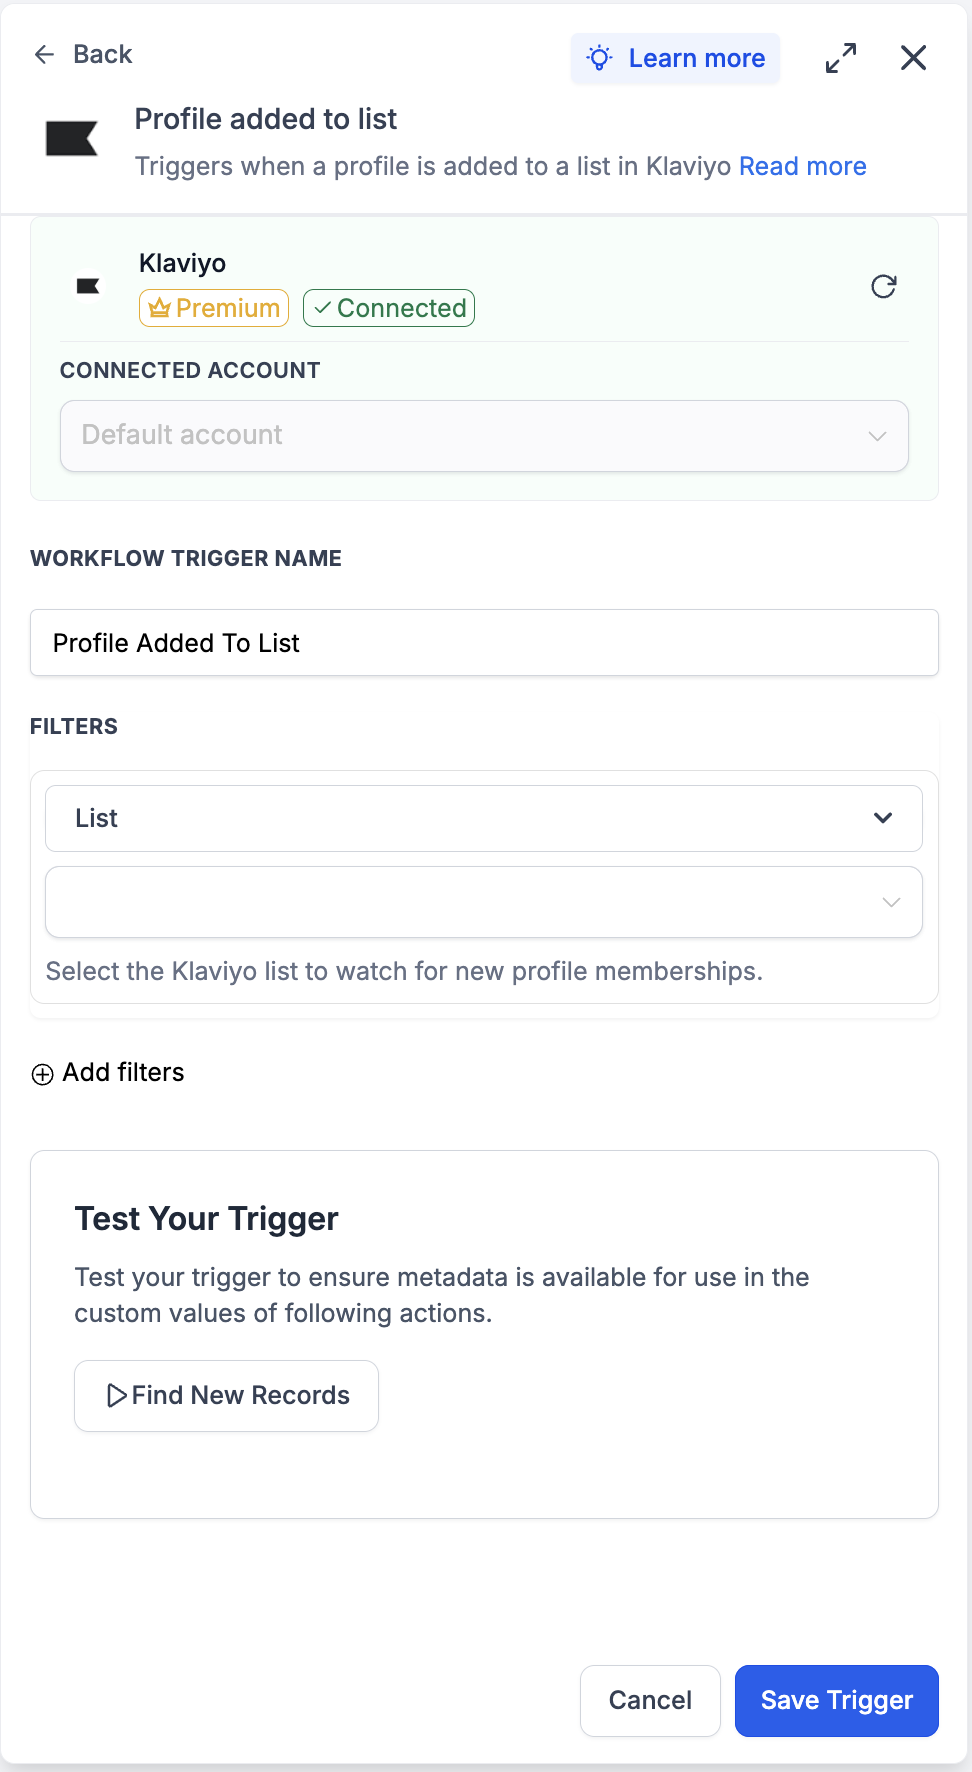
Step 2: Configure the Trigger
- Connected Account—select the Klaviyo account this trigger should monitor. This defaults automatically if only one account is connected.
- Workflow Trigger Name—assign a meaningful label, e.g., ‘New VIP List Member’.
- Filters → List—choose the Klaviyo list to monitor. The helper text states, ‘Select the Klaviyo list to watch for new profile memberships.’
- Add filters (optional)—apply additional conditions if the workflow should trigger only under specific circumstances.
Step 3: Test the Trigger
- Click Find New Records within the Test Your Trigger panel.
- The system will retrieve the most recent matching list membership records from Klaviyo.
- In the Records — Select Mapping Reference dropdown, choose one of the returned records. This locks the profile-payload schema for subsequent steps.
- Click Save Trigger to finish.
Example: Setting Up an Action (Send Campaign)
This example will illustrate how to use the Send campaign action to initiate a pre-staged Klaviyo campaign as soon as a workflow condition is satisfied.
Step 1: Stage the Draft Campaign in Klaviyo
- Remember, Send campaign is the trigger, not the composer—the campaign’s recipients, subject, and content must already be set up in Klaviyo and saved as a draft. Create the campaign in Klaviyo as you typically would and stop prior to clicking Send.
Step 2: Add the Action
- Within the workflow, click Add to insert a new step.
- Open the Apps tab and select Klaviyo.
- Choose Send campaign from the action list.
Step 3: Configure the Action
- Connected Account—select the Klaviyo account where the draft is located.
- Action Name—assign a meaningful label, e.g., ‘Send Launch Day Broadcast’.
- Campaign—select the draft from the dropdown. The helper text indicates, ‘Select the draft campaign to send now.’ Only campaigns currently in draft status will be displayed.
Step 4: Test the Action
- Click Test Action.
- Confirm—the campaign will be sent to its preconfigured audience in Klaviyo. Treat test sends carefully: utilise a small test list within the audience of the draft before executing this in a live workflow.
- Save the action and conduct a full Test Workflow before publishing.

How to Test the Trigger and Action
Always test before publishing. Testing locks the payload schema and provides downstream actions with a valid record to map against.
- In the trigger panel, click Find New Records.
- If no matching records appear, manually execute the action in Klaviyo (add a profile to the list, fire a test event) and then re-fetch.
- Select the returned record as the mapping reference. Ensure the profile-payload fields are correctly displayed in the preview.
- Within the action panel, click Test Action.
- The action will execute against the live Klaviyo account using the designated inputs.
- Open Klaviyo and verify the outcome—a new profile under Profiles, a list membership under Lists, a tag attachment under Tags, and a campaign send under Campaigns.
- If something appears incorrect, double-check the field mappings and retest. Once satisfied, click Save action, then perform a full Test Workflow before publishing.
Frequently Asked Questions
Q: What is Klaviyo?
Klaviyo is a marketing automation platform for email and SMS, built around unified customer profiles. Profiles are managed through lists, segments (dynamic groups defined by profile conditions), and metrics (tracked events such as ‘Placed Order’ or ‘Viewed Product’). Klaviyo campaigns and flows target these elements.
Q: Are Klaviyo triggers and actions premium workflow components?
Yes. All triggers and actions are classified as premium and consume premium action credits at the standard automation rate. Usage of Klaviyo plans (active profiles, SMS credits) is charged directly on your Klaviyo account.
Q: Are the triggers instant or polled?
Polled. All triggers poll Klaviyo every 5 minutes and return matching records since the last poll, in sequence. Please account for this timing—the triggers are near real-time, not instantaneous.
Q: How do I authenticate Klaviyo?
OAuth. Click Connect your account on any Klaviyo step; you’ll be redirected to Klaviyo’s authorisation screen. Review the requested scopes—Accounts, Campaigns, Events, List, Metrics, Profiles, Segments, Subscriptions, Tags—and click Allow. You’ll return to the Workflow Builder with the panel displaying ‘Connected’.
Q: Are email and SMS subscriptions managed together?
No. Klaviyo tracks email and SMS consent separately. The Subscribe profile action has channel flags—you can subscribe to email only, SMS only, or both. Always ensure to reflect the explicit consent of the customer.
Q: Can I update a profile’s properties and subscribe them in one step?
Not within a single action. Klaviyo requires the subscribe call and the property update to occur as separate operations. Use Subscribe profile first, then follow with Update profile for any changes to custom properties.
Q: What does the New event trigger return?
The event payload—metric name, event timestamp, event properties—and the associated profile (email, phone, profile ID, custom properties). Use the Metric filter to focus on the specific event type of interest (for example, only ‘Placed Order’ events).
Q: How does Send campaign determine which campaign to send?
The action’s Campaign field is a dropdown populated with the draft campaigns available in the Klaviyo account. Recipients, subject, and content are configured within Klaviyo at the time of draft creation—Send campaign triggers the sending, it does not compose the campaign.
Q: How do tags differ from lists and segments?
Tags serve as organisational metadata attached to lists and segments—they do not store profiles themselves. Use tags to categorise lists and segments (e.g., ‘onboarding’, ‘win-back’, ‘black-friday-2026’) to maintain a clean reporting and filtering process as your account grows.