
Advanced Builder: Go-To Connections for Triggers
You can now set a start action for each trigger. Simply drag Go-To connections from the trigger to any action on the canvas. This means no more single entry paths; you can define the entry point for each of your triggers!
Different triggers lead to different journeys. Direct each trigger to the exact node where it should commence, keeping complex entry logic tidy and avoiding large if-else stacks.
-
Select a trigger
→ drag its connector to the target action.
-
Visual cue:
Go-To links for triggers appear as a dashed line with an arrowhead (normal paths remain solid).
-
Execution behaviour:
When the trigger condition is met, the workflow jumps directly to the target action and continues from there.
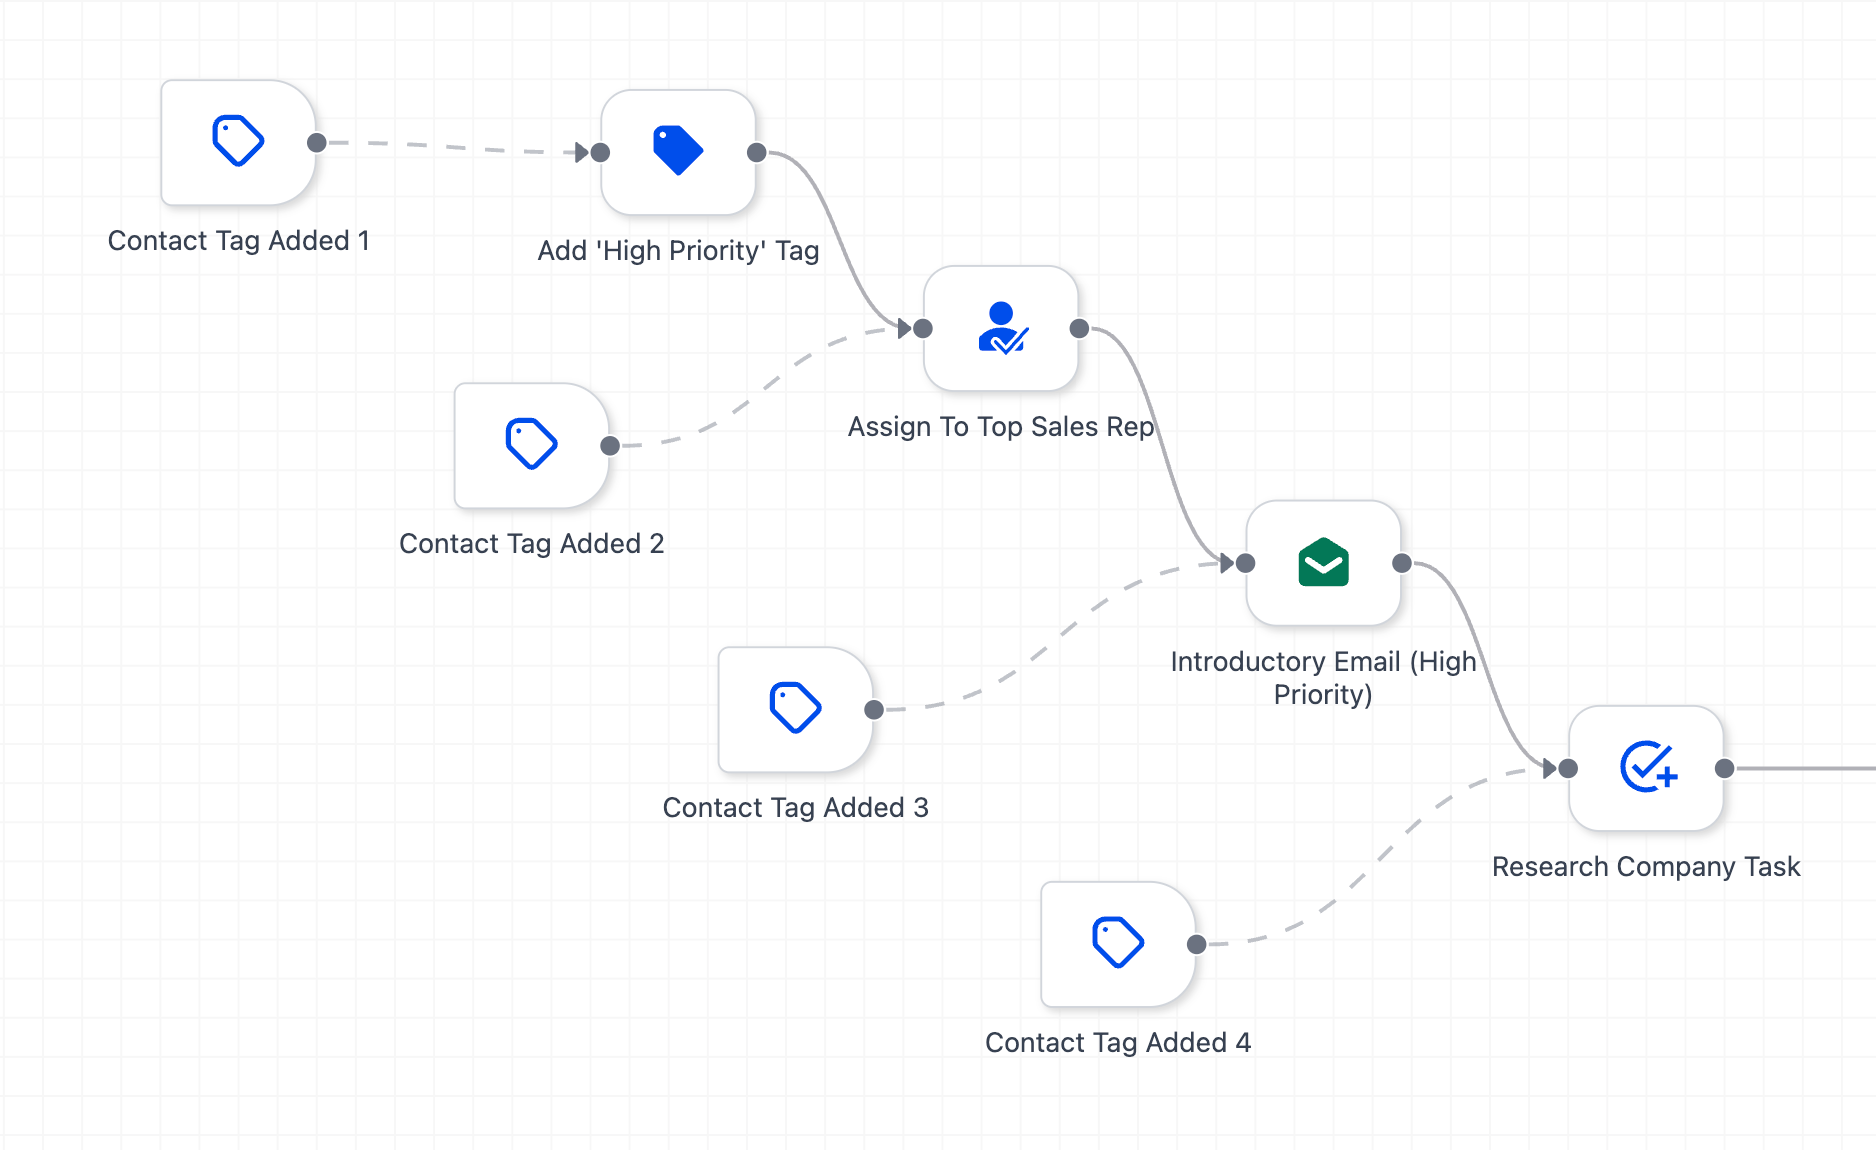
You can establish multiple Go-To connections for each trigger, enabling you to specify precisely where a contact should start when that particular trigger is activated.
-
Open your workflow in the Advanced Builder.
-
Add/position your triggers and actions.
-
From each trigger, drag the dashed Go-To connection to the action where it should begin.
-
Reassign later by dragging the same connector to a new node.
-
Save → Publish when you’re ready.
Previously, multiple entry paths necessitated duplicate workflows or extensive if-else chains. Now, Go-To connections for triggers provide you with clean, maintainable, and dynamic routing— all within a single workflow.