Cookie Consent Banner v2 with Customization Support in Funnels & Websites
The Cookie Consent Banner helps manage user consent for cookies, ensuring compliance with privacy regulations.
- Customisable options for banner appearance and user consent.
- Predefined cookie categories for easier management.
- Advanced settings for consent expiration and layout customisation.
🛠️ How to Get Started?
- Open your funnel or website in the Funnels & Websites Builder.
- Go to the page where you want to enable the banner.
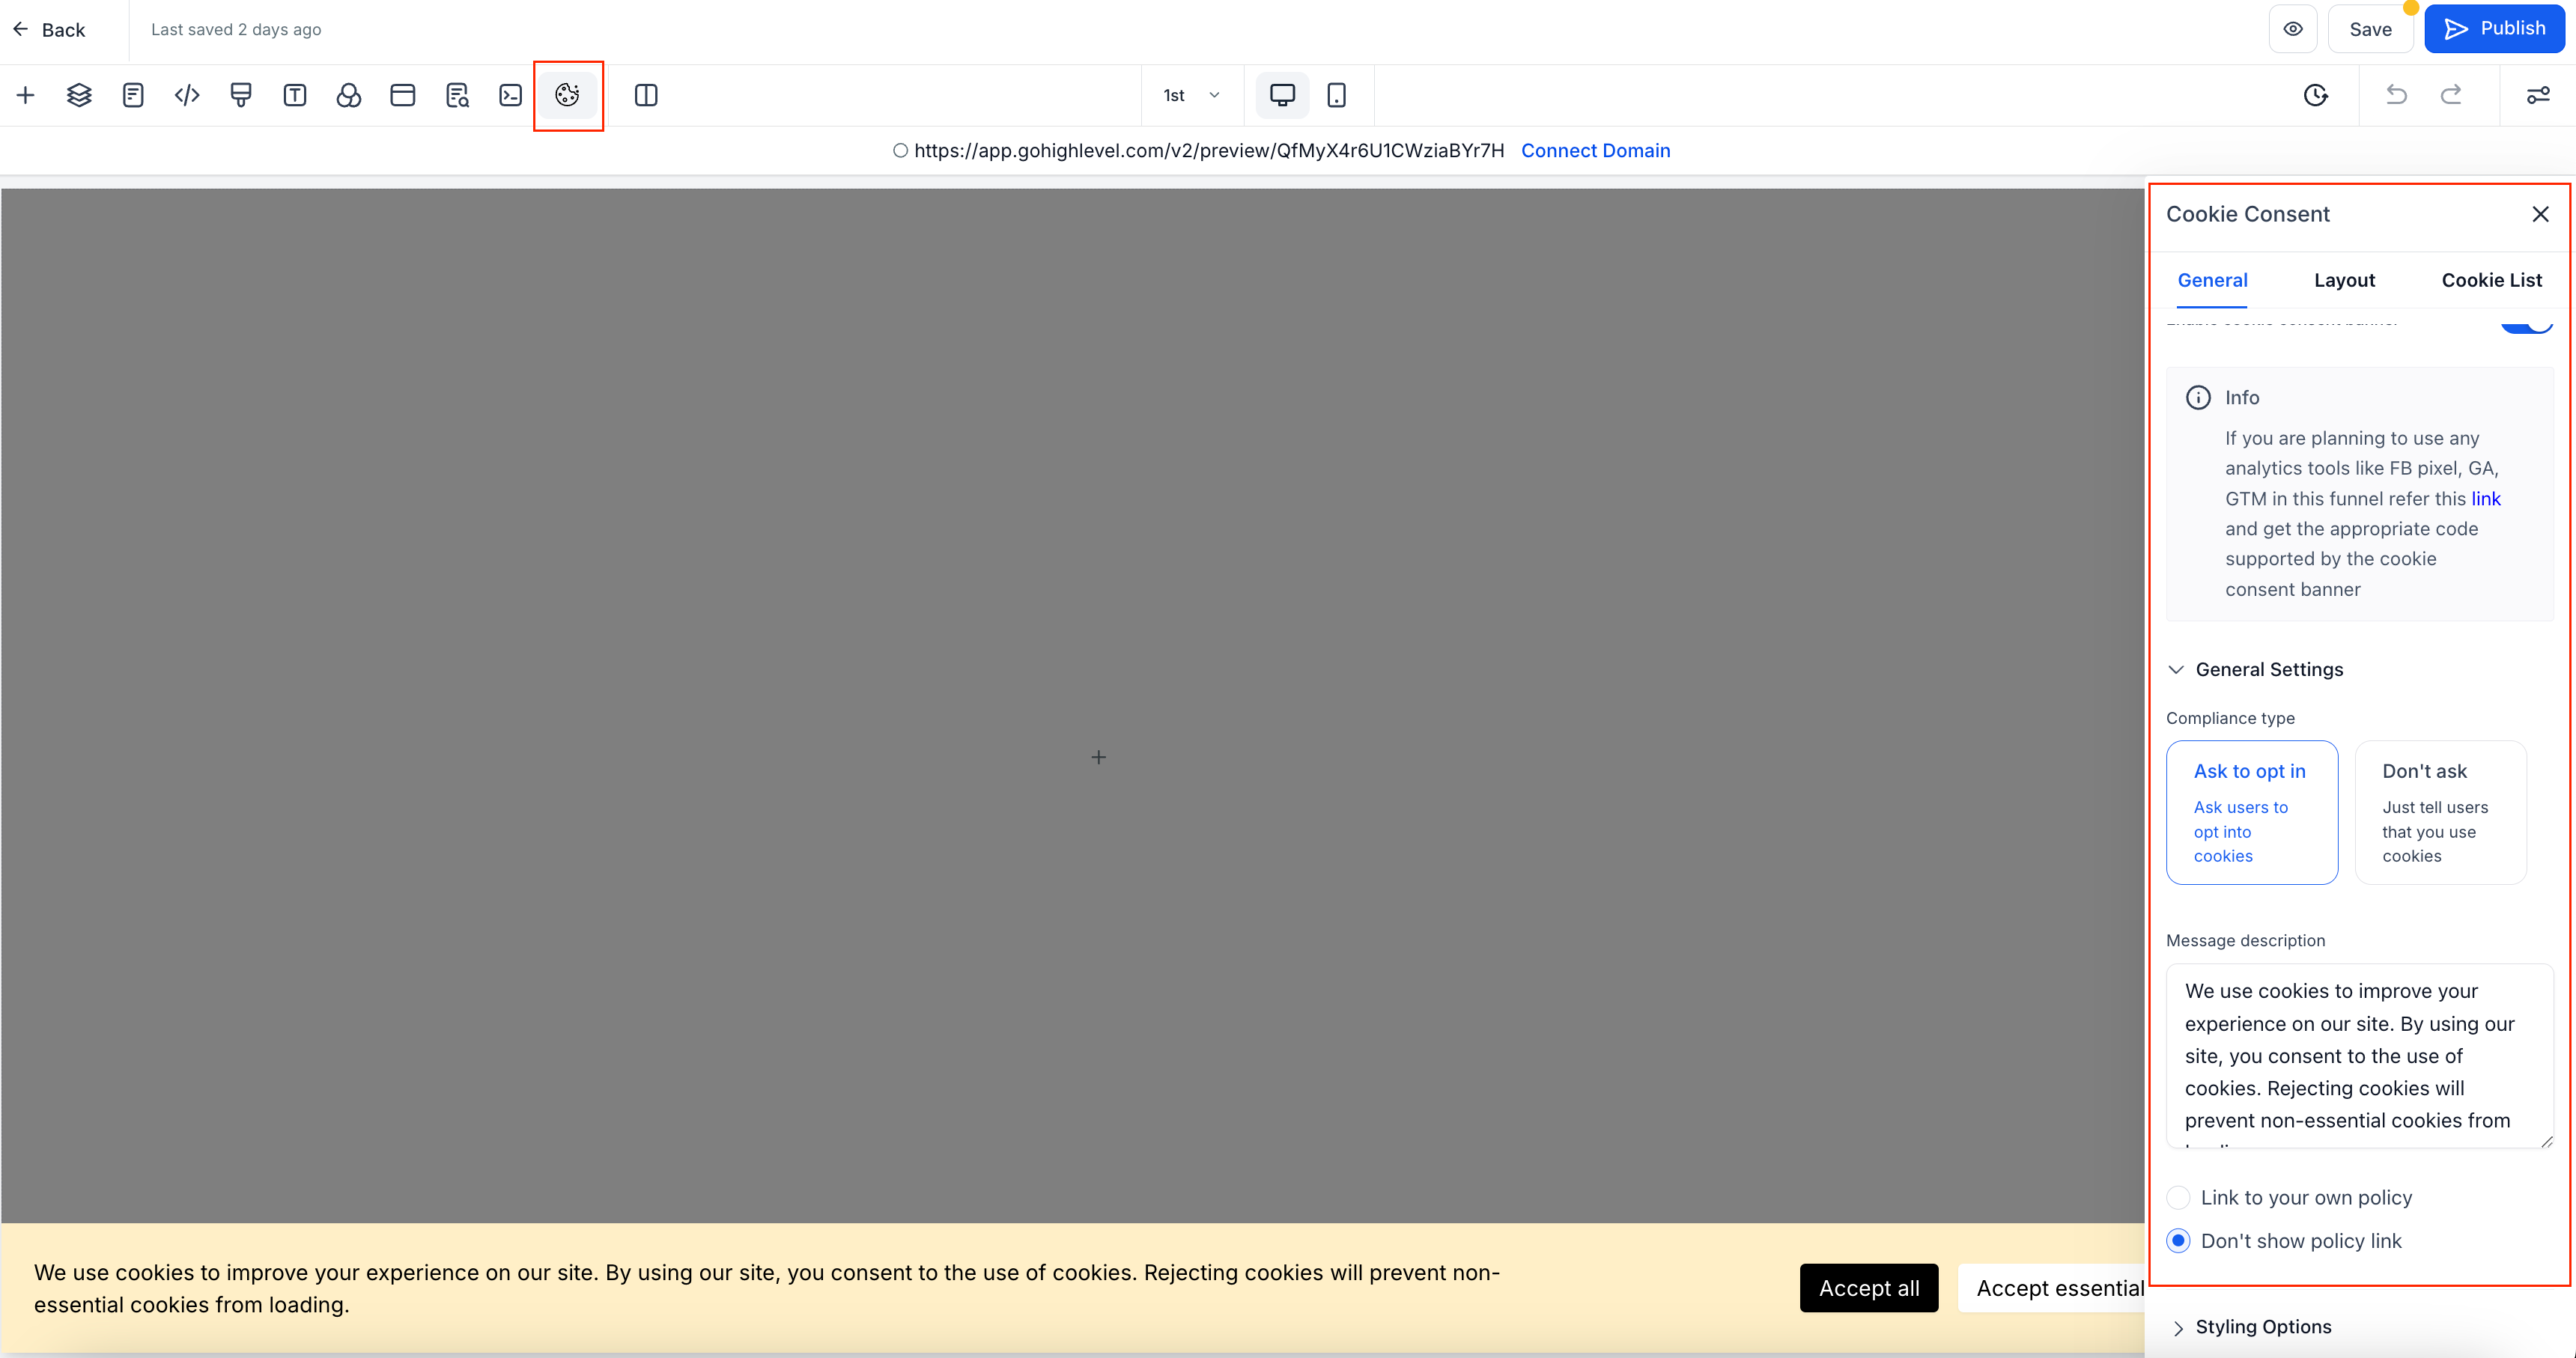
- Click on the Cookie Consent Banner Settings icon.
- Toggle the switch to enable or disable the banner.
2. 🎛️ Configure Button Actions
- Accept Essential – Accepts only necessary cookies for website functionality.
- Accept All – Accepts all cookies, including tracking and analytics.
- Reject – Accepts only essential cookies.
- Cancel – Closes the popup and reopens the main banner.
- Save Preferences – Saves the user’s selected cookie settings.
🎨 Customisation Options
- Enable or disable the cookie list.
- Choose the compliance type:
- Ask to Opt-In – Displays “Accept Essential” and “Accept All” buttons.
- Don’t Ask – Shows only an “OK” button (users cannot reject cookies).
- Add a message description and link to your privacy policy.
- Customise the banner’s appearance (colours, fonts, text size, etc.).
- Consent Expiration – Set the number of days before consent expires.
- Layout Options – Choose different display styles for the banner.
📋 Managing the Cookie List
The Cookie List feature lets users enable or disable different types of cookies. When activated, visitors can select which cookies they want to allow.
📌 Predefined Cookie Categories
- Essential – Required for website functionality (always enabled).
- Functional – Supports features like social media sharing and feedback collection.
- Analytics – Tracks visitor behaviour (e.g., page views, bounce rates).
- Performance – Helps optimise site speed and user experience.
- Advertising – Used for targeted ads and marketing.
- Uncategorised – Any cookies not assigned to the above categories.
🏷️ Adding Cookies to Categories
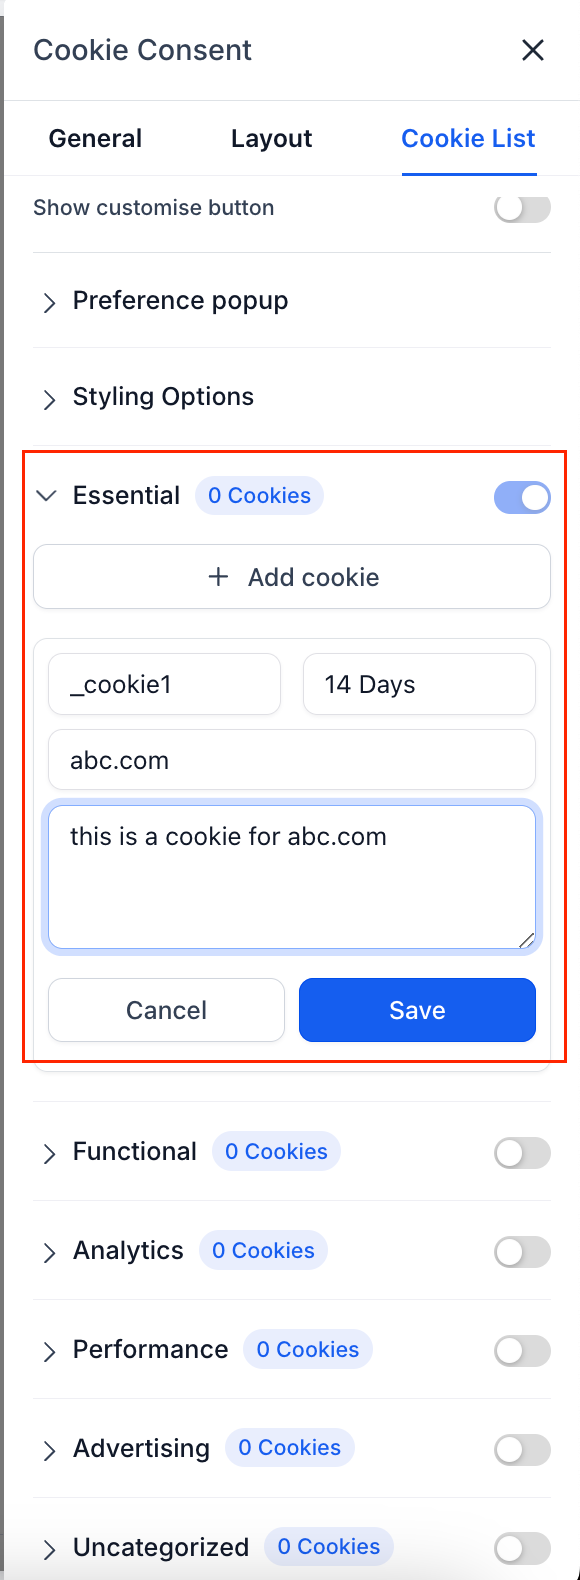
For each cookie, specify:
- Cookie Key – Name of the cookie (supports regex patterns for multiple cookies).
- Duration – How long the cookie lasts (e.g., 1 day, 30 days, 1 year).
- Domain – The domain setting the cookie.
- Description – Purpose of the cookie.
🔍 Using Regex Patterns
You can use regex patterns to match multiple cookies, such as:
- ga-* – Matches all cookies starting with “ga-” (e.g., ga-1234, ga-3241).
- _fbp – Matches Meta Pixel cookies.
- _ga.* – Matches all Google Analytics cookies.
🔎 Scanning Your Website for Cookies
- Temporarily disable the Cookie Consent Banner.
- Use a free tool like CookieServe to scan your website.
- Review the detected cookies and assign them to the correct categories.
⚠️
Important
: Disable the banner before scanning, as it blocks non-essential cookies, preventing a complete scan.
- ✅ Compliance – Ensures alignment with GDPR, CCPA, and other privacy laws.
- 🛡️ User Control – Allows visitors to manage their cookie preferences.
- 🎨 Customisation – Fully configurable to match your brand’s look and feel.
- 🔍 Improved Transparency – Provides clear descriptions and links to privacy policies.
- 📊 Marketing Integration – Helps categorise and manage tracking cookies effectively.


